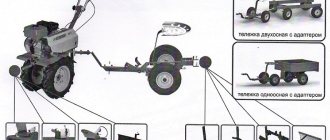
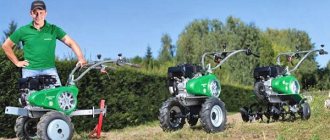
GRILLER DIFFERENCE FROM GRILLER
Lister, disk, Dutch, active... Which is better?
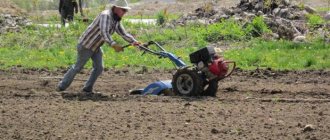
If there are 2 different hillers lying next to each other, you won’t immediately figure out which one is better. And if there are 3 hillers or 4... Which one should I buy? I’d like to take them all and try them in my own garden, and then find out. Yes, but you have to pay for everything, but you don’t want to. Therefore, we will briefly describe the hillers. Maybe this will help you, the reader of our site, not to make a mistake in your choice. When you hear the word “okuchnik”, no one doubts that this is agricultural. working body for hilling cultivated plants. The way it is. If you have planted potatoes in even rows, try to stretch such a hiller between the rows, and you will see how it pours soil into the rows with its wings. This is hilling. In addition, hillers can cut furrows for planting and fill the furrows with planting material (if you turn the cultivator in reverse). There is one more operation, which we will discuss at the end of this article. In the meantime, let's talk about hillers, since hiller is different from hiller, and everyone has different capabilities. Photo 1.
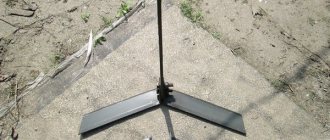
Hiller with a fixed working width (lister). This is the simplest type of hiller (in the photo there is a phone next to the hiller - for scale). It has 2 fixed wings, spread apart relative to each other. Since the wings do not move, you cannot adjust the working width of the hiller, which means that you will not have to adapt the hiller to the row spacing, but the row spacing to the capabilities of the hiller. Therefore, you will be able to effectively use such a hiller next year, after you have studied it in use and determined the row spacing at which it is most effective. Since the working width of these hillers is small, they are suitable for row spacing of 20-30 cm. And, of course, they are not suitable for row spacing of 45...60 cm, the most common row spacing for growing potatoes. Hillers with a fixed working width are used with light motor cultivators weighing up to 30 kg and engines with power up to 3.5 hp. Another feature of such hillers is thin stands in the form of a round rod with a diameter of 12 mm. The thin stand is specially made so as not to overload the light motor cultivator. If the operator deepens the hiller too deeply or the soil is dense, the stand will simply bend and thus protect the cultivator from overload. Therefore, do not try to strengthen your stance: you can cause trouble. This hiller design is simple and compact, which is convenient for transportation. But the angle of the wings is excessively large, and the wings themselves are quite concave, which is why the hiller is quite energy-intensive. In addition, when working, it will turn out the wet soil, drying it out. And when the soil moisture is 18% or more, the hiller will begin to stick. Therefore, its use is limited. Photo 2.
The same hiller with a fixed working width, but with a more streamlined shape. It is easier to work with, does not dry out the soil and is less prone to sticking than the first hiller.
Hiller with variable working width. Has a stronger stance and a larger grip range. With such a hiller you don’t have to wait until next year. Using a simple adjustment mechanism, you can move the wings apart or move them, thereby adjusting it to any row spacing. These hillers are used with motor cultivators and walk-behind tractors weighing more than 30 kg and having 4.0 hp engines. and more. This is the most common type of hillers. Surprisingly. Since they have a common drawback - relatively high energy intensity. This is caused by the fact that the wings of the hiller push the soil to both sides, part of which, after the hiller passes, crumbles back into the furrow (see figures a and b):
Figure a) shows a cross-section of the hiller (blue lines) and the furrow (brown lines) it cuts. When the hiller moves forward, soil prism 1, raised by the hiller to position 2, returns to its original position 1. That is, whether we want it or not, the soil will still be located at an angle of repose. So it turns out that part of the engine power is spent on useless work. For heavy walk-behind tractors with 7-8 hp engines. and moreover, this is not so important, but for lighter equipment, it is very sensitive. Not only will your arms hurt, your back and legs will ache.
Varieties of lister homemade and factory hillers
The simplest non-adjustable hiller is a solid structure of two diverging shaped plates, arranged mirror-like and having a common stiffener rib.
This is the base, but if you add flaps in the form of adjustable plates, you get an adjustable hiller of your own making. Without plates, this is an excellent ripper for potato rows, where the soil is compacted and air does not reach the roots.
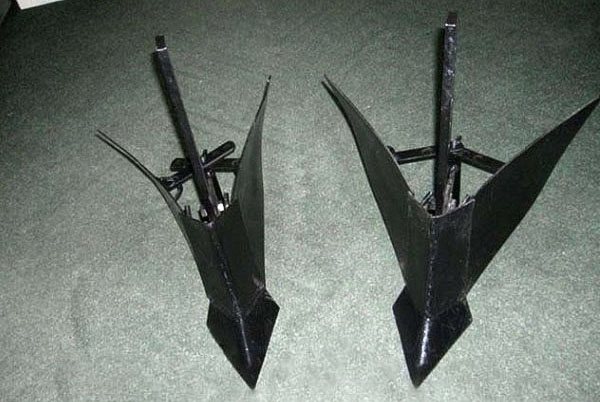
A hiller with a fixed grip can be used on flat fields with equal row spacing when using a seeder. Such a tool is used with low-power traction, since the adjustable plates create additional resistance to the ground layer.
Medium-power walk-behind tractors are equipped with a device with an adjustable grip. Such designs are used in narrow row spacing about 35 cm wide. Corn raking is done with just such a hiller.
But creating a break-up mechanism and making it work are two different stories. To regulate the depth of lowering into the soil, to create an even stroke, a frame structure with a hitch must be made. Only a well-centered unit will require a minimum of effort for high-quality tillage. The hiller is immersed in the ground due to the vertically positioned stand. If the potato hiller to the walk-behind tractor with your own hands goes low when setting up or the angle of the stand is adjusted along the surface. For a double-row lister tool, when mounted on a frame, it is necessary to accurately set the distance between the arms.
Do-it-yourself hiller for the Neva walk-behind tractor
Hiller is equipment designed for plowing a furrow in the earth. It works in such a way that the earth is distributed evenly on both sides of the furrow, and therefore the hiller is a very popular and often used attachment for a walk-behind tractor when working in garden plots. It facilitates human labor when planting, loosening the soil, or is ideal for hilling potatoes and other plants. In addition, it is not at all difficult to build it with your own hands; you only need to purchase a minimum amount of materials and have basic skills.
How to set up a hiller of any design for work
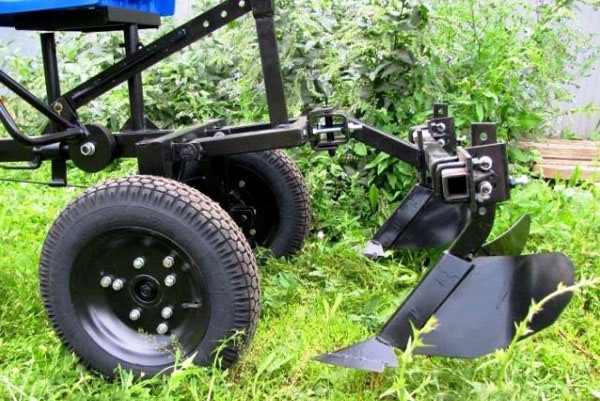
Any mounted or trailed tillage equipment requires adaptation. Before you start working on the field, you need to make sure that everything is installed correctly, secured and adjusted. A trial area is selected and a test run is made. At this moment, you should listen to the technique, check the stroke profile, the distance between the grips. It is necessary to set the angles of attack on the disks, and the depth on the sheets.
It is important to select a processing speed that matches the power of the mechanism and the quality of field processing.
Types of hiller and technology of its construction
Building a hiller for the Neva walk-behind tractor with your own hands will help you save significant money. Moreover, it is not difficult if you act step by step and according to the recommendations. The main thing is to have a welding machine, an angle grinder, metal and fastening elements at hand.
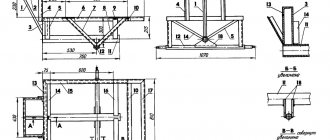
- Disc hiller for the Neva walk-behind tractor. The design contains two disks located next to each other, but at an angle to each other. They are attached to the frame, which in turn is connected to the walk-behind tractor through a hitch. This hiller makes higher ridges, different from other types. To create it you need: parts from a seeder or metal 2 mm thick, which are attached symmetrically at an angle to each other on bearings with oil seals at a distance of the track width of the walk-behind tractor using cold welding or bolts. It is better not to add anything of your own during the first assembly, but to completely focus on the already created drawings, and most importantly, strictly adhere to the measurements;
- to connect the hitch bracket without a drawbar, you can change the distance between the disks by rearranging the racks. The leash is connected to the hitch with a stopper, secured with washers and bolts, and the stopper itself is inserted into a square pipe and tightened.
- The active (propeller) hiller for the Neva walk-behind tractor is installed only on mini-tractors with two forward gears, because only in the second gear is it possible, in addition to loosening, to transfer soil from between rows. The creation method is similar to the previous one, except that the walk-behind tractor must have 2 forward (!) gears and a PTO. When assembling the hiller, you need to make several bushings with brackets and additional metal blades.
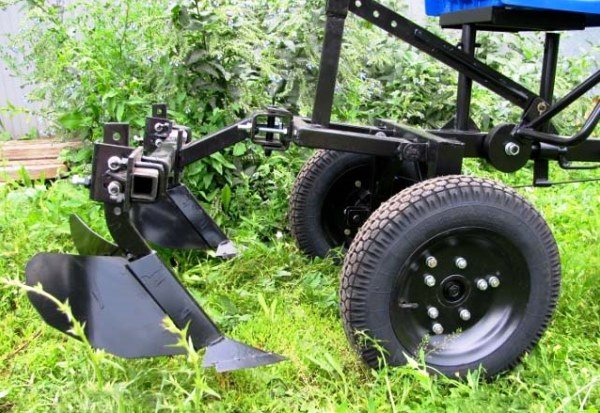
Lister or double lister (two-row) hiller. The most primitive hiller, the design of which consists of two sheets connected in such a way that the structure looks like wings. To assemble a listed two-row hiller for a Neva walk-behind tractor, you need: 3 mm thick metal for the base, a 4 mm thick steel strip for the bracket, a 5 mm steel sheet for the field board, a 2 mm steel sheet for the wings of the hiller (they need to be bent a little) . There are rods at the tail of the equipment to control the tilt of the wings. You can also optionally install a wing adjustment system.
Use of hiller when cultivating soil
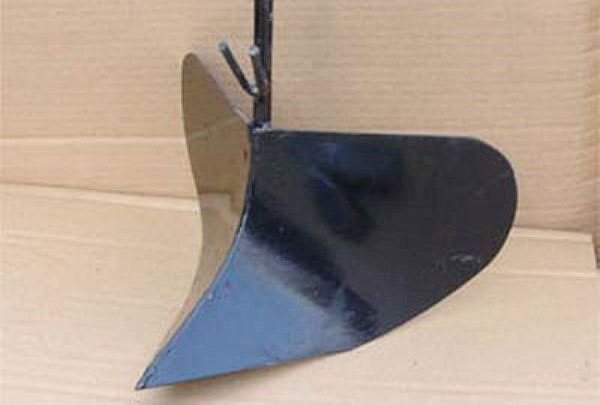
The hiller must, overcoming the resistance of the soil, lift it up from a flat area, creating a ridge. The pointed end must be lowered below the surface to a specified depth. It lifts and loosens the soil, and in order to direct the soil to the base of the plant, there are guide planes that create a collapse on both sides. The design of the hiller for a walk-behind tractor looks like an arrow from above, and from the side the blades look like butterfly wings.
Design improvements concern contours that reduce drag and make the ridge higher or wider. The principle of operation of such a hiller does not change - it loosens, removes a layer of soil and throws plants planted in a row towards the base. The same method is used to cut furrows for planting potatoes.
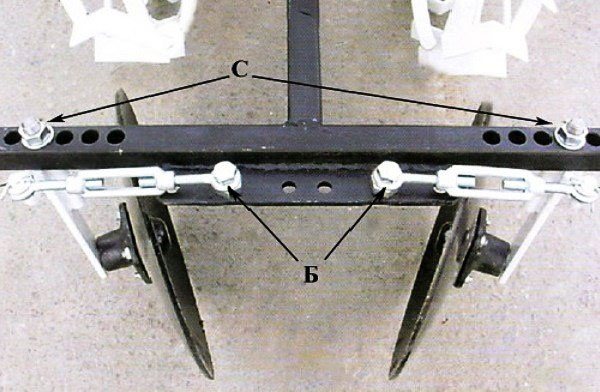
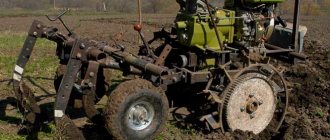
Another type of hiller for walk-behind tractors is paired discs. Due to the thin rim, the structure penetrates the soil to a given depth with low resistance. They are not pulled in a stationary state, they rotate, and thereby overcome resistance with less effort. But in order for the discs to create a stroke, they must have an adjusted vertical angle and take-off angle. The distance between the discs on the frame is set according to the width of the row being processed. Look at the video of how they hill up potatoes with a walk-behind tractor on the rocky soil of Simferopol:
On this topic:
A potato digger for a walk-behind tractor will help you quickly and efficiently...
Aug 18, 2016
Motoblock Salute to help the gardener
Aug 17, 2016
BACK FORWARD 1 of 3
Conventionally, all hillers are called by their form and principle of operation:
- lister;
- disk.
At the same time, lister arrows have various forms of bending of planes; an arrow going deep into the ground can have a massive tip. The flaps or plowshares have a bend, a slope, and can have an adjustable and customizable profile.
Pairs of disc hillers for walk-behind tractors must match in size, contour and weight. Otherwise, the comb will not be even. The system for adjusting the angles of descent and inclination allows you to set the desired stroke profile.
For powerful heavy walk-behind tractors, hillers are paired, light weeders for MTZ walk-behind tractors are mounted in threes.
The device made it easier and faster to hill potatoes with a walk-behind tractor - video
Advantages of a walk-behind tractor with hiller
Cultivating the land with a hiller has a number of advantages:

- after treatment, the plants grow fully and correctly;
- reduces physical stress on a person;
- increases productivity levels;
- ensures high quality agricultural work, which means it increases overall productivity.
Many people who cultivate the soil will appreciate the advantages of this device, and, as it has already turned out, doing it yourself is not at all difficult.
Choosing the best hiller for a walk-behind tractor
The main purpose of the walk-behind tractor is to cultivate the land, where one of the tasks is to prepare it for planting. Consequently, walk-behind tractors can be equipped with special equipment, one of which is a hiller. With its help, preparatory and planting work with potatoes is carried out, and it greatly simplifies the work. The hiller's job is to make a furrow in the ground and cover it with soil after planting.
But even this is not all, also hillers can have different types of design and characteristics, the most popular can be considered:
- propeller-type hillers;
- lister hillers;
- disk;
- with the ability to change the coverage width.
If you don’t know which hiller is best for a walk-behind tractor, let’s look at the characteristics and advantages of each type.
Disc hiller
It is distinguished by excellent efficiency; the operating efficiency and power of the hiller are influenced by the operating speed of the cultivating unit, where at lower rates the power increases. With a disk hiller, the life of the device increases. Having a simple design and a clear operating principle, the hiller does not require much effort during operation. It also does not require special maintenance. Ideal for use before planting potatoes. Disc models are considered the most popular, if only because they are available in several types. The following disc hillers are available:
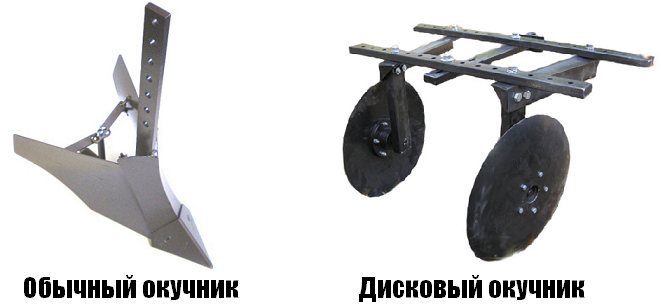
- With a constant working width - the average constant width is 20-30 cm, set by the manufacturer. Recommended for use with walk-behind tractors of low power and weight.
- With variable working width - they are actively used for hilling various agricultural crops; adjusting the working width will allow you to adjust the hilling for potatoes, and after changing, you can hill up beans with a smaller width. The maximum possible working width is 70 cm, so it is perfectly adjustable for different processes.
Also, many people ask the question: how to set up a disk hiller?
Hilling potatoes with a walk-behind tractor
Hilling potatoes is one of the most labor-intensive processes, especially when it comes to large areas. Manipulation can be done either manually (using hoes, hoes, etc.) or automatically (using a cultivator or walk-behind tractor). In this article we will talk about how to properly hill potatoes with a walk-behind tractor . Before we begin the story, let’s look at the hilling process itself.
How to properly hill potatoes?
Hilling potatoes is a mandatory action.
Its essence is to sprinkle the stems of the bush with loosened soil. This is done so that more oxygen reaches the root crops. In addition, hilling allows you to get rid of weeds to some extent, protect the plant from sudden frosts and accelerate its development. During the season it may be necessary to carry out three hillings. Let's talk about each in more detail:
- The first hilling of potatoes should begin when the plant reaches a height of 15 cm. Usually this period occurs in the second or third ten days of May.
During the first hilling, it is necessary to remember that the layer of sprinkled soil should not exceed 10 cm. If this rule is not followed, it will be very difficult for the shoots to develop.
- The second hilling of potatoes should be done when the bushes reach a height of 20-25 cm. As a rule, this moment occurs 1-2 weeks after the first hilling.
- Not all gardeners carry out the third and final hilling, but we recommend not skipping this stage. The essence of the process is the same, however, this time the stems need to be sprinkled with soil as high as possible.
During hilling, you need to pay attention to the condition of the soil. It should not be too dry or wet. The ideal option is moderately moist soil.
Hilling potatoes using a walk-behind tractor
The walk-behind tractor greatly simplifies the process of hilling potatoes.
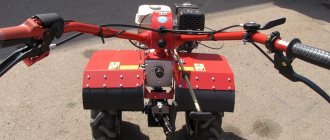
For example, a field of several tens of acres can be manually hilled in a day at best. If you resort to using a walk-behind tractor, you can complete this work in just a few hours. So, let's look at how to properly hill potatoes with a walk-behind tractor. Before we start talking about the process of hilling potatoes, let's talk about the special structures that loosen the soil. If anyone has ever seen a walk-behind tractor, he or she has already guessed that we are now talking about rippers and hillers.
The elements are quite primitive; some experienced gardeners even manage to make potato hillers with their own hands. In total, it is customary to distinguish two types of hillers: plow-shaped and disk. Each one differs from each other in certain characteristics. We will tell you about them now.
Hilling potatoes using a walk-behind tractor with a plow-shaped hiller
To work with a plow-shaped hiller, care should be taken to adjust the angle of attack and the depth to which the dive will occur.
When this is done, you can start working. To do this, the hiller needs to be pushed a little deeper into the ground. It should remain in this position throughout the entire hilling. If the structure is above the ground during potato processing, it must be lowered. To do this, the stand leans back. If the opposite phenomenon occurs, the hiller is deeply immersed in the ground, then the stand must be tilted forward.
Hilling potatoes using a walk-behind tractor with a disk hiller
To work with the disk variety of hiller, you will need to set two parameters.
We are talking primarily about the distance between the disks. It directly depends on the type of potato and is generally 40-70 cm. Then you need to remember to adjust the angle of attack (rotation). It should be the same for both hiller discs.
Hilling process: how it happens
So, it’s time to hill the potatoes with a walk-behind tractor.
The first thing to do is place some rippers at the front of the structure. At the back there will be a hiller, which was discussed above. When all the necessary manipulations have been completed, you can begin processing. To do this, the walk-behind tractor is placed strictly in the center between the rows of potatoes and the minimum speed is turned on. The process has started. The potatoes are hilled up to the end of the ridge, then the walk-behind tractor is carefully unfolded and the next row spacing is processed in the same order. According to many experts in the field of gardening, you can hill up potatoes with a walk-behind tractor only once. During the second treatment of the bushes, there is a high probability that the tubers themselves will be damaged. If you decide to hill up potatoes with a walk-behind tractor, then you need to take care of the “correct” planting of the seed in advance. Processing with this technique is only possible if the distance between the rows of plants is approximately 65-70 cm.
As you can see, hilling potatoes with a walk-behind tractor is very simple. If you master the principle of operation and begin to apply it in practice, the time saved can be spent on solving other important matters.
Hilling potatoes with a walk-behind tractor - video
glav-dacha.ru
In order to get a good potato harvest, you need to pay due attention to caring for it. The hilling procedure, which is carried out several times during the growth of the plant, along with watering, is the main component of such care. Its essence is to roll the soil onto the plant.
How to set up a hiller?
Using washers and bolts on the hitch bracket . The hiller is attached to the walk-behind tractor. If you are working with an adjustable hiller, it is important to consider parameters such as the depth of immersion into the ground and the width of the immersion angle. The disc hiller must be positioned so that its legs are positioned vertically.

Next, you will have to adjust the width of the angle and the depth of immersion; for this, lanyards and special screws are used, which regulate all indicators. You will have to configure it for specific crops for which hilling is carried out.
How to set up a disk hiller?
Adjusting the equipment involves its correct direction relative to the furrow. It must be parallel to the beds on the land with a certain angle of inclination and width of the furrow. Good setup of equipment will allow you to avoid mistakes and achieve good results during work.
To set the angle, the unit has a special screw adjustment, which tilts the entire device relative to the walk-behind tractor. The depth of the furrow depends on the part being adjusted. In addition, adjustment is carried out when installing the hiller to the walk-behind tractor. This is done using holes made in the rack for fasteners. If moving hillers are installed, you can adjust the width and height of the ridge produced.

The disc hiller is of higher quality than the plow, despite the fact that it takes more time to cultivate the land. The work is carried out not on two furrows, as is the case with a two-row hiller, but on one.
Propeller type hiller
If your walk-behind tractor has two forward gears, this type of hiller will be an ideal option. The basis of the presented hiller can be called special propellers, the task of which is to first crush the soil and then get out all the unnecessary weeds. The resulting loose soil is available for use, that is, ready for hilling.
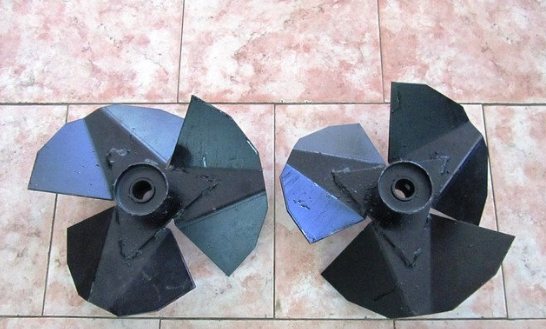
Try to use streamlined hillers; they allow you to leave moisture in the soil, because they have less intensity when working with the soil.
Hiller with variable working width
The ability to change the working width is one of the most important characteristics of a hiller, so the presented model can be called the best hiller for a walk-behind tractor. This is the most convenient and effective way to prepare the ground before planting. The design of the hiller involves an adjustment mechanism that can adjust the location of the wings. By setting this indicator correctly, you get the optimal width between the rows. Manufacturers of such models recommend using hillers with variable working widths in conjunction with walk-behind tractors with a power higher than 4 hp. This is an important parameter, otherwise it will harm the walk-behind tractor itself.
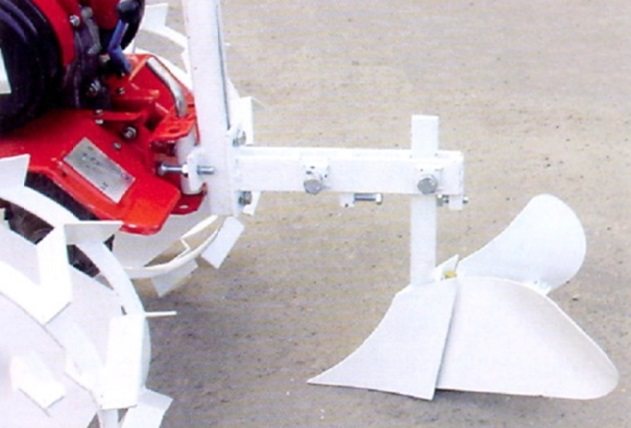
How to make a hiller for a walk-behind tractor with your own hands
To loosen the soil in large areas, tractors with special multi-row attachments are used. Small motorized cultivators are suitable for small farms. Hillers are not always included in the kit, however, you can make an effective attachment yourself.
Required Tools
Some models of hillers are equipped with a motor. For a standard garden, simpler options are used. Most of the necessary tools can be found in every garden plot; some must be prepared in advance. List of equipment for creating a hiller at home:
- hammer;
- welding machine;
- vice;
- calipers;
- taps (to make internal threads) and a driver for them;
- grinding machine with different attachments;
- gas burner (used for targeted heating of metal in those places where it needs to be bent);
- Workbench;
- other auxiliary elements.
See also How to grow potatoes from seeds and when to collect them
It is important to check each of the tools for functionality and safety. Personal protective equipment – masks, goggles, gloves – are purchased in advance.
We make various models: diagrams and step-by-step assembly
To make your own hiller for a walk-behind tractor, you need to study the instructions for creating various models. You can make almost any option yourself without a motor. You will need a standard set of tools, consumables, and drawings.
Simple propeller-type hiller
Suitable for motor cultivators with power adjustment and at least two gears. Torque combined with forward rotation makes hilling better. The soil is loosened, cultivating the rows. It is not difficult to make such equipment. Activators can be purchased in advance. The elements are mounted on metal axles (it is important to set the correct distance). If there are bushings with brackets, then changing parts of different sizes is acceptable.
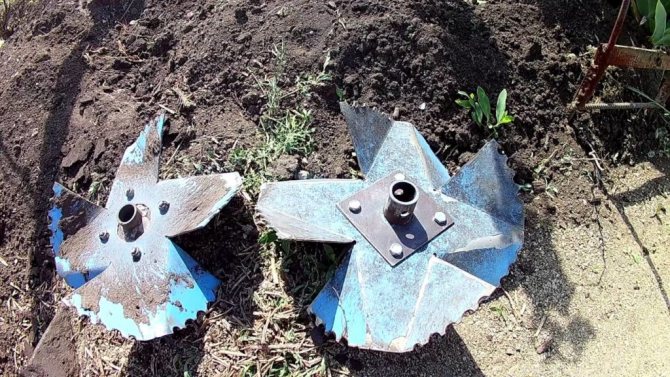
Workpiece with variable working width
Such equipment allows you to work with different distances between rows of plants. The use of an additional mechanism is convenient when there are several types of crops planted in a similar way on the site. The following parts will be required:
- three metal strips with several holes at equal distances (one is placed in the center, the rest are attached to the wings of the hiller using bent nails, for example);
- bolt and screw for fixing metal elements (it is important that it remains possible to unscrew the mechanism at any time and move it to other holes).
A significant disadvantage is energy consumption. Using a hiller with a variable grip width takes a lot of effort; your arms and back get tired quickly.
Disk model
The main design element is oval discs. The maximum diameter is no more than 40 cm (if the hiller is planned to be used for potatoes). They are made from a metal sheet 0.02 cm thick. The edges are sharpened - further efficiency depends on the quality of sharpening. The next stage is a bridge with racks. Connecting elements are attached to the pipe (can be purchased at any store). The ends are turned down, the discs are secured with bolts and nuts.

Double lister
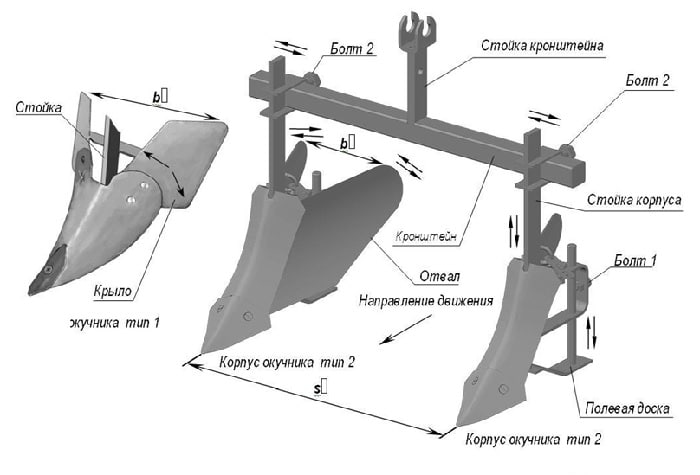
This machine allows you to process two rows at the same time. It has a more complex design. A metal rod is used as a base (it is recommended to take square options). Two single-row hillers (can be homemade) are attached as working elements.
For the manufacture of racks (fastening parts), steel sheets 2 mm thick are taken. A strip is cut out and rectangular slits are made on the sides. The metal is bent in the middle at an angle of 90°. A double eyelet should form into which the stand is placed.
It is important to make a hole for the fastening bolt in advance - on the right and left. The carving is done manually using a tap with a crank. Screw the bolt into the back of the mount through the threads in the rod and tighten. Move the racks along the bar. The wings are sliding, which allows you to adjust the blade mode.
See also: How to treat and how to poison the Colorado potato beetle during potato flowering
Rotary active hiller
The rotary active hiller is suitable for working with walk-behind tractors equipped with at least three speeds (the first is for hilling, the second is for spreading soil). It is not suitable for all motor cultivators, so DIY is often required. You can cut the sheets yourself or purchase ready-made propellers. Then install it on the stand - the dimensions depend on the dimensions of the cultivator.
Double-row hilling apparatus
The device allows you to process two rows of crops simultaneously. The disadvantage is significant energy consumption and labor intensity. It is manufactured by analogy with a double sheeting machine. The latch is a metal beam onto which classic triangular-shaped hillers are attached.
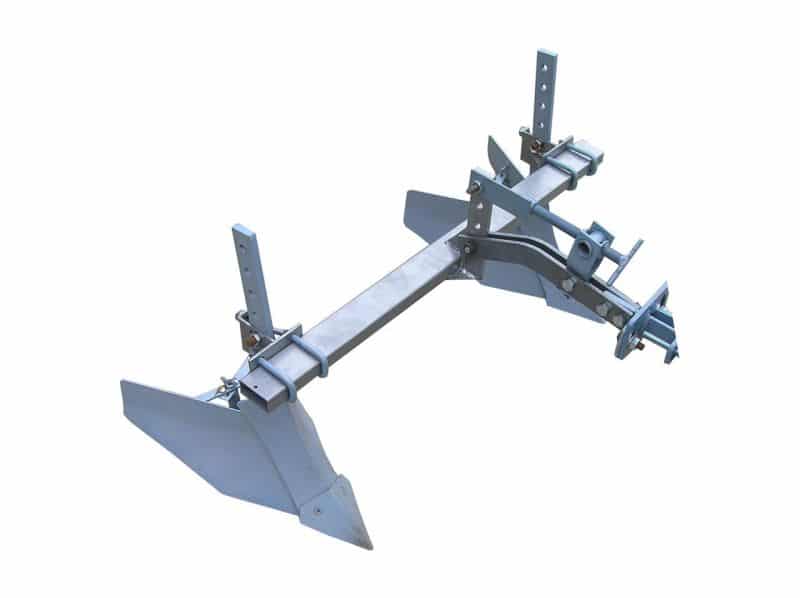
Single-row homemade cultivator
The group of single-row homemade cultivators includes propeller-type hillers, with variable working width, and disk variants. They allow you to process each row separately, are more convenient to use (relatively lightweight, take up little space during storage).
Single-row hiller for walk-behind tractor
A standard model with easy use can be called a single-row hiller; it also has the ability to work with low-power walk-behind tractors, providing good performance. It is possible to hill only 1 bed per pass, but in turn this will make it possible to configure the device to exact parameters. Single-row models can also be presented in different designs and are designed for specific walk-behind tractors.

Video
Which hiller is best suited for the Neva walk-behind tractor?
Hilling up plantings by hand is a long and tedious task, so the idea of a device that would form earthen ridges on the sides of planted plants was quickly brought to life by craftsmen. At first these were manual hillers, but with the advent of walk-behind tractors in our gardens, similar devices appeared for them - first homemade, and then factory-made. Nowadays, there are such a huge number of hillers of various designs and modifications - both factory-made and those made by craftsmen that choosing the best option for a certain brand of walk-behind tractor, for example, the Neva, is often difficult.
DIY disc hiller for walk-behind tractor, photos and drawings
Potatoes take second place in terms of popularity of cultivated crops. If you are engaged in growing potatoes, then you will need a walk-behind tractor with the appropriate attachments on your farm. Below we will describe why you need to hill up potatoes and how to make a disk hiller for a walk-behind tractor with your own hands, which will save you time and money.
Potatoes are a fairly tenacious plant and have a fairly high germination rate. It is on the cultivation and hilling of potato beds that the production of a high yield depends. Hilling is one of the most effective and useful agronomic technologies used when growing potatoes.
Main types of hillers
When deciding which hiller to choose for your walk-behind tractor, you must first decide on the technical capabilities of your walk-behind tractor, and then the type of device you need. For example, for the Neva walk-behind tractor today you can use 3 main options for these devices:
- With fixed working width;
- With adjustable working width;
- Disc hiller.
Each of these options has its pros and cons. The first two options are made in the form of a rake, which cuts furrows in the ground, and a specially shaped ploughshare distributes the cut soil evenly on both sides. In the disk version, the role of the rafter is performed by two disks installed at a certain angle to each other.
How to make a homemade potato hiller with your own hands
Reading time: 7 minutes
In potato cultivation, one of the most costly and labor-intensive processes is its 2-3-fold hilling. Performed on large plantations with tractor trailed cultivators in summer cottages in the absence of a walk-behind tractor or a tractor, it is carried out with a homemade or factory-made manual potato hiller.
What this agricultural implement is and how to make it with your own hands will be discussed in this article.
Purpose and principle of operation
A manual potato hiller (tiller, furrower, marker) is a relatively small and light agricultural implement driven by muscular human power.
The most common hand-held plowshare hiller consists of the following parts:
- working body – hiller body, consisting of a point (ploughshare) and a double-sided blade with “wings”;
- stand - a thick metal strip, welded at one end to the body of the hiller, and fixed to the frame at the other;
- frame made of metal round or profile pipe;
- support wheel.
In disk hillers, instead of the ploughshare body of the hiller, two spherical disks located at an angle to each other are installed on the frame.
When growing potatoes, this agricultural implement performs the following operations:
- cutting planting furrows;
- hilling and formation of ridges during inter-row cultivation;
- destruction of weeds and destruction of the soil crust formed after heavy rains or drought;
- spreading out rows when harvesting potatoes - for this operation, a special potato digger body is used, in which, instead of a solid double-sided blade, 2-3 rows of rods are used.
Required materials and tools
To make such a homemade product, the following materials are needed:
- cold-rolled sheet steel 2.5 mm thick;
- steel corner 20×20×3 mm;
- a loosening pointed paw from a cultivator or a disc from a potato digger or disc harrow;
- steel blank for the stand, 10 mm thick and 20-30 mm wide;
- pipe (round or profile);
- a wheel from a folding bicycle, a garden wheelbarrow;
- 4 bearings.
Among the tools in the process of making a homemade hiller you will need:
- welding machine;
- Bulgarian;
- drill;
- compressor with spray gun;
- emery;
- vice.
Consumables you will need are metal cutting discs, electrodes, primer and oil paint, sandpaper, a sanding attachment for a drill, and solvent.
Preparatory stage
Before starting to manufacture the hiller, perform the following preparatory work:
- drawing up a schematic drawing manually on paper or using computer programs (AutoCad, Compass, Graphite);
- calculation based on the drawing of the required amount of materials;
- preparation of materials and tools.
Varieties of manual hillers for potatoes: diagrams and step-by-step assembly
Depending on the design, there are the following types of manual hillers: lister (ploughshares with a fixed working width), disk, furrow makers (markers).
Lister mechanisms
Potato lister hiller is made as follows:
- A sheet of metal is cleaned of rust using a special attachment on a drill.
- On the cleaned surface, using a special pattern, two blanks are outlined.
- The blanks are cut out with a grinder and processed on an emery machine.
- The wide ends of the workpieces are bent in a vice so that the distance between them is equal to the row spacing.
- Two workpieces are welded with their front, non-curved edges.
- The working part of the body is reinforced with a corner.
- At one end of a thick steel strip, make 2-3 holes with an 8 mm drill.
- The second end of the steel strip is welded to the inner surface in the working part of the body.
- A small cut is made on a round pipe with a diameter of 25 mm and a length of 2-2.5 meters at a distance of 60-80 cm from one of its ends.
- At the place of the cut, a bend is made so that the angle between the pieces of pipe is 100-105.
- A fork with a wheel from a folding bicycle is attached to the end of the pipe.
- At a short distance from the fork, a long through cut is made along the pipe.
- Just above the bend, parallel to the cut, two strips with several adjustment holes are welded.
- The housing with the stand is inserted into the cut, fixed in the adjustment holes using a bolt and nut.
- A bicycle handlebar is attached to the long part of the pipe using a clamp.
- After checking the functionality of the assembled hiller, all its components are cleaned, degreased, primed and covered with 2 layers of dark oil paint.
The process of assembling and testing such a hiller can be seen in the following video:
Disc hillers
Homemade disc hillers are made as follows:
- Disks from a harrow or potato digger with bearing units are fixed on L-shaped posts.
- Two pieces are cut from the channel, and a through hole is drilled into its flanges, having the same diameter as the L-shaped disk stand.
- After this, a piece of thick-walled tube is welded between the shelves.
- A hole with a diameter of 12 mm is drilled in the middle of the tube, a nut is welded to it, into which a long bolt with a hex head is screwed.
- A hole is drilled at the base of each channel section, a nut is also welded to it, and a hex head bolt is screwed in.
- Racks with disks attached to them are inserted into brackets made of channels and tubes.
- A handle is welded to a square profile pipe (frame) on one side, and a fork for the support wheel on the other.
- A piece of square pipe is welded 20-30 cm from the fork across the frame.
- Brackets made of channels with racks with disks fixed in them are placed on the welded square pipe on both sides.
- A support wheel is installed in the fork.
- The depth is adjusted by vertically moving the stand in the bracket and fixing it with a screw screwed into the nut.
You can see how a disk hiller assembled using this technology looks and works in the following video:
Manual potato hiller
The manufacturing process of the simplest manual hiller consists of the following operations:
- Applying the contours of two blank parts of the dump onto a sheet of rust-free metal.
- Sawing blanks with a grinder, processing them on an emery machine.
- Bending the wide ends of the workpieces at a certain angle.
- Welding workpieces, cleaning the weld seam.
- Welding between two parts of the moldboard of a reinforcement bar.
- Attaching a tube with a hole to a reinforcement rod.
- Cleaning, degreasing, priming the hiller.
- Fastening the handle in the tube, fixing it with a small self-tapping screw.
- This type of furrow maker is used for cutting planting furrows and hilling potatoes in small areas.
Hiller for tractor
A homemade hiller for tractors T-40, T-25 is a more labor-intensive and costly unit. Unlike hand tools, it is equipped with more durable and reliable factory hiller bodies with paws
Simplified, the manufacturing process consists of the following steps:
- Welding a frame from a square profile pipe 50×50×2 mm.
- Attaching support wheels to the frame with rods and adjusting screws.
- Attaching racks with hiller bodies to the frame.
After final assembly, all parts of such a home-made unit are cleaned, degreased and painted with oil paint. In this case, the racks with working parts are painted orange or yellow, and the frame itself is painted blue or dark blue.
You can clearly see the design of one of the homemade units of this type in the following video:
We manufacture a product for a walk-behind tractor
The simplest disk hiller can be made using the following video instructions:
In the form of a plow
A plow-shaped hiller is made in the same way as a lister hiller. The only difference in the design of this unit is the presence of a special adjustment of the distance between the blade wings.
Advantages and disadvantages of homemade devices
A self-made hiller has the following advantages:
- low cost;
- versatility and multifunctionality;
- the possibility of producing a hiller with non-standard dimensions;
- high quality compared to many mass-produced factory analogues.
- The main disadvantages of such agricultural implements include:
- mandatory knowledge of working with a welding machine;
- application of great physical effort when working on heavy and rocky soils.
Thus, manual hillers are quite convenient, multifunctional and easy-to-manufacture agricultural tools for small gardens and summer cottages.
Which option is optimal for the Neva walk-behind tractor?
The option of installing a hiller with a fixed working width on the Neva is the simplest and most cost-effective solution. But it also has a lot of disadvantages: there is no way to change the height of the ridge; in addition, such a device will only be effective if the required row spacing was maintained when planting the plants.
The device with adjustable working width can be easily adjusted to any row spacing between plants. However, its productivity compared to the fixed version is significantly lower, since when working with it, part of the soil falls back into the furrow.
Both types of these hillers can be with one or two bodies, or, as they are commonly called, single-row and double-row. It is clear that the productivity of double-row ones is twice as high as that of single-row ones. But you need to keep in mind that using a two-row hiller for the Neva walk-behind tractor on loam, not to mention clay soils, is extremely undesirable. Still, the Neva walk-behind tractor is not a tractor, and it will be difficult to work with two bodies.
The disc hiller for the Neva walk-behind tractor is the most expensive, but at the same time the most practical option. It makes higher combs, in addition, by moving the discs apart or sliding them together, you can adjust their height. Also, the height of the ridge can be partially adjusted by changing the angle of attack of the disks.
How to make a hiller for a walk-behind tractor yourself
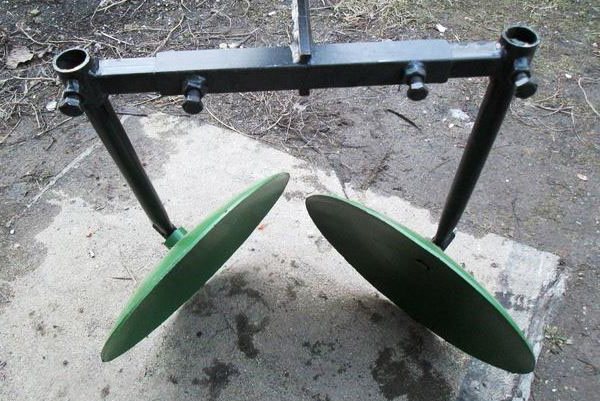
Attachments are not included with the walk-behind tractor. They are made and sold separately. On the agricultural machinery market, you can find a hiller for any type of cultivator, designed for the draft power of your horse. But the problem is that the finished tool costs more than 10 thousand, and this is a significant amount for a rural resident in modern conditions. But in a landfill or outside the outskirts you can find everything you need to build a hiller for a walk-behind tractor.
In order to install a propeller hiller, you need to make sure that your walk-behind tractor has a two-shaft engine with reverse, 2 forward speeds. There must be a selection shaft.
First we need to decide whether we will make a disk or list hiller. A single or double row tool will pull the cultivator. Is it necessary to provide sliding wings, an adjustable distance between the two tools? That is, before building a hiller for a walk-behind tractor with your own hands, you need drawings and videos, for example, this one:
https://www.youtube.com/watch?v=PvHAKZkD-tk&feature=youtu.be
Of course, it is necessary to have skills in working with metal. Not every villager will be able to discern valuable components for the household in an abandoned heater barrel. Therefore, they go to craftsmen for advice and ask for help.
But not only the disks, the device for fastening them must be thought out, and to help the master, do-it-yourself drawings of a disk hiller for a walk-behind tractor are offered.
On this topic:
Comparison of walk-behind tractors from Motor Sich and Forte
How to choose a walk-behind tractor for dacha work
Review of Centaur walk-behind tractors
Walk-behind tractor attachments for harvesting
BACK FORWARD 1 of 3
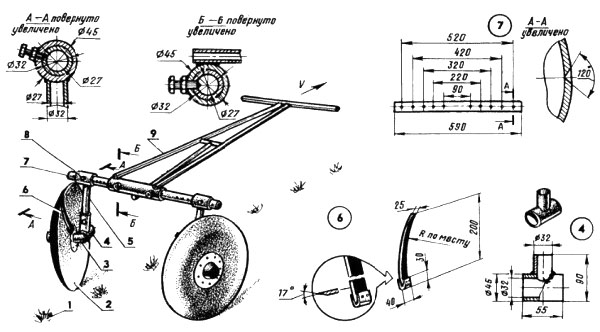
Here, in addition to the disks, the dimensions and cross-section of the most important components of a homemade hiller are given.
The design will undergo significant changes if you manage to find discs from decommissioned hullers or other agricultural equipment. In any case, when making a frame, you will need to consider a disk adjustment system.
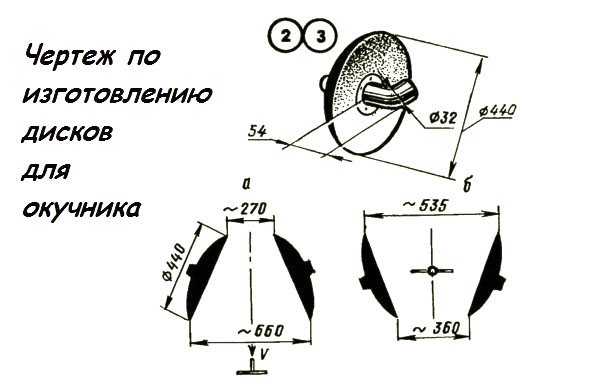
The wisdom of masters with golden hands is limitless. So if there are no disks, they can be replaced by a round blade from a circular saw. The steel is of high quality, the teeth additionally loosen the soil. You will still have to create a bearing assembly, otherwise the saw blade will not rotate. But tool steel and a do-it-yourself disc hiller for a walk-behind tractor will work effectively in the hands of a craftsman.
When creating a new device in your homestead, do not forget about safety measures. When carrying out welding work, you work with a mask. But at this time, “bunnies” can be caught by loved ones, watching the craftsman. When working with dangerous tools, take care of the safety of others.
Technical characteristics of popular models of hillers
Double-row hiller OH-2: weight – 4.4 kg. Dimensions – 450x130x45 mm, working width – 300 mm. It is hung directly on the frame of the Neva walk-behind tractor.
Sliding disk hiller: maximum working width – 700 mm, disc diameter – 370 mm, total equipment height – 625 mm, maximum bed height – 30 cm. This model has the ability to adjust the discs in width, depth and height. For aggregation with the Neva walk-behind tractor, a universal hitch is needed.
There are many other models that can also be used to work with the Neva walk-behind tractor - the main thing is that the fastening mechanism matches this particular brand of walk-behind tractor. And the simplicity of the hiller design allows you, taking the factory version as a model, to easily make it yourself. But this is a topic for another discussion.
