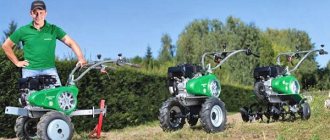
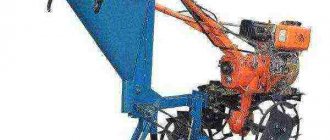
Wheels for walk-behind tractor: overview of types, how to make it yourself
In most cases, before buying a walk-behind tractor, people pay special attention to the practical characteristics of the device, without being interested in the quality and features of the wheels.
This approach can hardly be called competent, because the quality and duration of operation of the equipment itself depend on these details. Since this unit is a multifunctional device, different wheels for the walk-behind tractor are offered:
- pneumatic;
- traction wheels;
- solid rubber versions;
- metal wheels with lugs.
In order to clearly understand the specifics of each type, you should consider their features in more detail.
How to make extension cords?
- Prepare two pipes with a diameter two millimeters larger than the size of the unit axis;
- Make a thread for screwing extensions onto the axle;
- On the back side of the pipe there should be holes two millimeters thinner than the holes in the wheel rims. If necessary, the pipes are cut;
- The wheels are fixed to the extensions using steel plates and secured with bolts.
Wheel extensions are installed on the output shafts of walk-behind tractors. During installation, it is checked how reliable the fastening and tightness of fixation is.
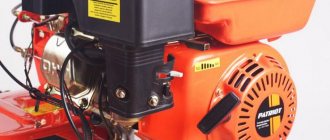
Pneumatic
These options are perfect for frequent plowing and digging up root crops.
An important point: the width of the wheels should in no case be less than 20 cm, and the diameter – 40 cm. The aggressive tread pattern will be a huge plus. Pneumatic components contribute to the incredible stability of the unit, but if damaged they must be replaced. They are often sold as wheels for Neva walk-behind tractors.
Self-production
Let's consider step by step how to make different types of snowmobiles with your own hands.
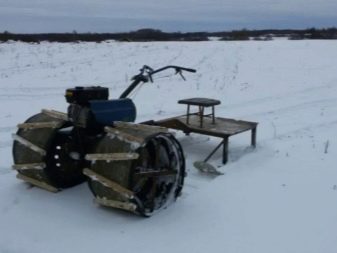
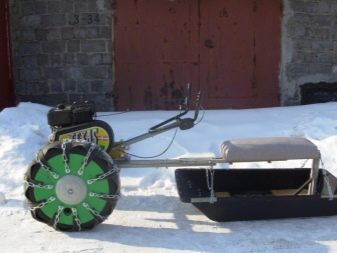
Snowmobile made from a walk-behind tractor on wheels
To turn a walk-behind tractor on wheels into a snowmobile you will need to take:
- iron connecting structure-trailer;
- wheels for winter use, capable of overcoming snow obstacles.
A strict condition of the whole idea is that the trailer must be rigidly coupled to the frame of the snowmobile. A metal channel about half a meter long must be welded parallel to the axis of the snowmobile. To do this, two holes are drilled at the edges of the channel. Clamps with holes along the edges provide additional fastening and structural rigidity. They are attached to the snowmobile axle with bolts and a locknut, using a crosspiece welded to the structure.
Read also: When to prune chrysanthemums for the winter in the fall
This mount will become a stopper that secures the trailer, preventing it from moving at an angle. Although such an element reduces the ability to maneuver on a snowmobile, it makes it more stable. Thus, a two-wheeled mechanism on one axle can easily be converted into a stable four-wheeled vehicle. In this case, you will not need any diagrams and drawings, or additional costs.
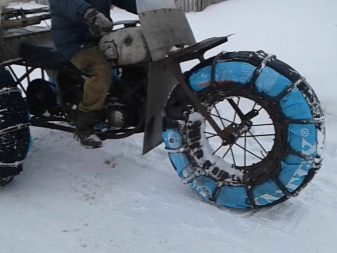
A snow scooter with a motor will also require the correct selection of wheels. The easiest option is to purchase them in a retail chain for winter use, but looking for the easy way is not always advisable. A more economical solution would be to make the wheels yourself. A budget option is to equip the snowmobile module with cameras designed for trucks. Deflated tubes are placed on each wheel and secured over the chain for driving on snow and ice. One is not enough, you need five. The inflated chamber in the wafer of chains will be an ellipse with a surface divided into segments, like a daisy.
Another option for using ingenuity and saving the family budget is to use metal hoops over the cameras. They should be wide enough, twice as wide as the snowmobile wheels. The diameter of the hoop must correspond to the inflated wheels of the walk-behind tractor and trailer. Several metal plates are welded on the inside of each hoop. The thickness of the plates should be made about 2-3 cm. Having lowered the chambers, you should put hoops on the snowmobile wheels and inflate them again. The inflated chambers will press against the metal circles as much as possible. Ground grip-like plates will help increase traction on snowy roads.
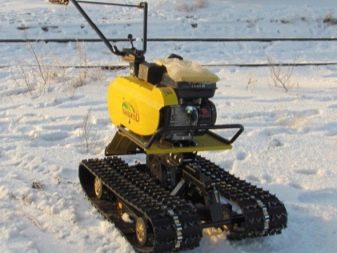
Snowmobile made from a walk-behind tractor on tracks
Converting a crawler walk-behind tractor into a snowmobile is a little more difficult, but possible. Using a walk-behind tractor motor, you can make a structure with great stability and maneuverability. To do this, a frame and transmission are mounted. Make sure that the engine power is sufficient; you will need a walk-behind tractor of at least 6 horsepower. To make a snow scooter with an engine you need to use:
- gearbox;
- fuel tank;
- steering;
- centrifugal clutch.
It’s good if you have tracks from other snowmobiles in your home supplies. If not, then don’t give up. It is quite possible to assemble the tracks yourself using available tools and materials.
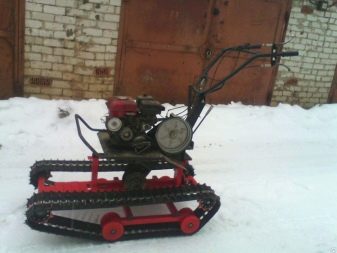
Next, you need to decide where to install the engine: front or rear. Try to make the structure as light as possible and the ski suspension as soft as possible. All this will allow you to achieve high cross-country ability in deep snow. The principle is this: inside the caterpillar, when moving, 4 wheels roll along the transport belt. Special ground hooks are attached to the tracks to enhance traction. The tracks can be made at your discretion, but you should carefully consider the dimensions.
Wide or too long tracks will place undue stress on the engine. Which, in turn, will make it more difficult to control a snowmobile on tracks in the snow. A track that is too small will not be able to support the weight of the entire structure with the driver. It will become unstable and will sink in loose and deep snow. To make tracks, the simplest materials are used: small-diameter plastic or plastic pipe, wheels, bearings.
Blanks 0.5 cm long are made from the pipe, from which ground hooks are obtained. They are attached to the tape at the same distance from each other. Then they are secured with bolts in the holes on the transport belt. The frame is made using square pipes or a channel. Use a tie rod without ball ends, since the axes of the steering wheel and skis lie in the same plane.
Bushings are attached to the front of the frame to allow the skis to turn. They can be made from steel couplings with small diameter pipes and threads. The ski racks and tie rods are welded to the pipes. To control the snowmobile, corners with a metal undercut are attached to the skis, which will allow you to move on ice or snow crust.
The weight of such a snowmobile is no more than 100 kg, and it is very easy to operate the vehicle. Since the motor power is low, the speed does not exceed 10-15 km/h, so there are no brakes. The end of movement occurs due to the reduction of engine speed or the so-called engine braking.
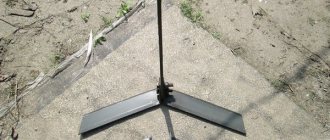
Metal with lugs
Such wheels have a certain weight, so they have additional power.
Steel teeth “push” the unit forward and do not allow it to load even in the most clay soil. Particular attention must be paid to the support front wheel, which bears a considerable load. It helps to optimize land work and increase the endurance of the walk-behind tractor itself.
Trailer wheels have a similar classification and are selected according to the same principles. Do not forget that in the process of transporting heavy loads, low pressure is applied to the wheels of the walk-behind tractor itself, and high pressure is applied to the wheels of the cart (trailer). Therefore, in this case you need to choose the most durable options.

Harvesting
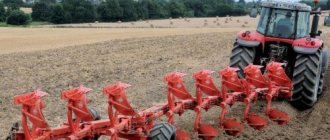
A walk-behind tractor is convenient not only for planting potatoes, but also for harvesting them. This is done in early autumn (September-October) in dry weather. To do this, an additional attachment is installed on the unit - a plower. Sometimes it is called a “potato digger.”
You can see how the harvest is harvested using a plower in this video
But you don't have to use it. It is enough to use a single-row hiller. He will lift the ground, and the potatoes will lie on the edge of the bed. All that remains is to go around the area and collect the ripe crop.
To avoid potato germination, after harvesting it should be placed in a dark, cool place. There it should lie for 2-3 weeks. Afterwards, the potatoes need to be sorted by size. And only after that send it to the cellar.
Planting and harvesting potatoes (video)
The walk-behind tractor helps gardeners plant potatoes quickly and efficiently, saves energy and saves time. The video below shows the entire process of planting and harvesting potatoes using a walk-behind tractor. Here it is shown and described in detail how this is done on the Neva and Salyut.
Do you use a walk-behind tractor in your garden when planting potatoes?
How to make wheels for a walk-behind tractor with your own hands?
You need to understand that it is impossible to make wheels from scratch with your own hands. It is necessary to find the basis and only then can we begin to form improved and useful devices.
Wheels from a motorcycle or car should be used as this base. You can only create a version with a lug on your own, because if wheel weights are not used so often, there is no point in purchasing new expensive products. On our website you can find a specialized article where all the features of creating lugs with your own hands are discussed in detail.
Procedure
Once a suitable drawing (component layout diagram) has been selected, the necessary tools have been found and the Druzhba saw has been dismantled, you can begin assembly. You should start with the frame, since all the elements of the motor unit will be attached to it. The process is completed by assembling the chassis, as well as additional blocks: if desired, headlights, gearbox and clutch, if the drawing is more complex and requires them. For the first time, it is best to choose a simpler drawing.
Frame assembly
The first stage involves the following actions:
- bend the pipe so that it takes the shape of 2 spars with edges pointing upward;
- the steering wheel is welded at the back (the easiest way is to weld two handles, but if available, you can use a ready-made steering wheel from a motorcycle);
- It is recommended to strengthen the structure with cross members from the same pipe;
- We cut out a “shelf” from a metal sheet for the battery, which we weld to the rear bends of the side members.
It turns out to be a vague resemblance to a sleigh. For heavier structures with more powerful power units, the frame can be made in the shape of a cube or similar to a tractor for 4-wheeled homemade products.
Assembly of the motor block
The most difficult stage is assembling the components. Before you begin, you need to mark on the frame the places to which the parts will be attached. The principle is as follows:
- a motor with a gearbox is mounted on top of the crossbars;
- a fuel tank is installed under the engine (a separate support should be welded under it), the battery is mounted on a special platform;
- To prevent exhaust gases from entering the control unit, you can make an exhaust pipe from a 7 cm metal tube with a diameter of up to 25 cm.
This is the basic version without a gearbox, which can be installed upon request. The drawings will help you understand the assembly in more detail. By and large, the details of “Friendship” are simply rearranged. The hitch is connected to the output shaft of the chainsaw.
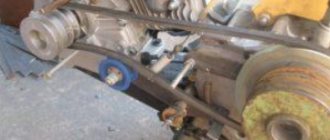
Chassis assembly
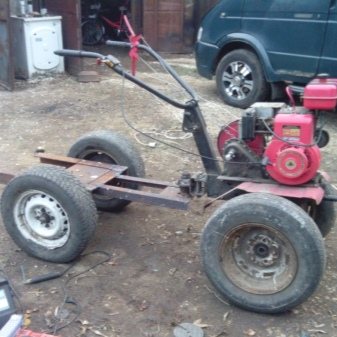
There are at least two options: you can use a ready-made axle shaft from a car, or you can make a homemade walk-behind tractor driven by physical force (the “chassis” of an old cart or wheelbarrow will come in handy, which will significantly reduce the weight and dimensions, because a car axle shaft will require the use of tires). In the first case, you will have to organize the drive from the motor to the axle shaft, which is not easy, so welding the “running” wheelbarrow to the frame is a more understandable option.
It is not difficult to figure out how to make a walk-behind tractor from a chainsaw if you understand the general operating principle of both units. In addition to “Friendship”, “Ural” and “Taiga” saws are also suitable for the walk-behind tractor. When deciding to experiment, you should understand that the homemade product will have limited functionality and low power, allowing you to process a maximum of 20 acres.
If you find an error, please select a piece of text and press Ctrl+Enter.
The walk-behind tractor is an effective assistant in the processes of cultivating the land, as well as further caring for the garden and garden. The easiest way to obtain this device is, of course, to purchase it. However, there is an option for making it using a chainsaw engine, in particular from the Soviet “Druzhba”. Its powerful engine, simple design and overall unpretentiousness make it well suited for this role.
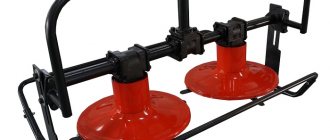
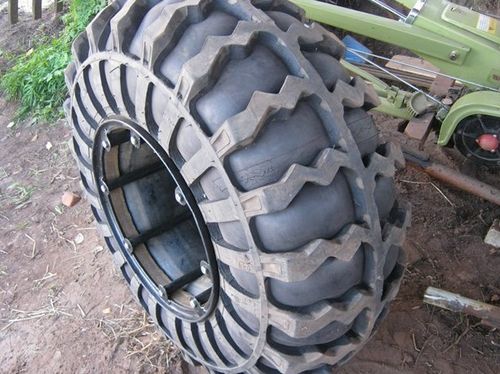
How to make twin wheels yourself?
A simple and even a little crude, but effective method has gained particular interest among farmers:
- First you need to find suitable wheels and tires;
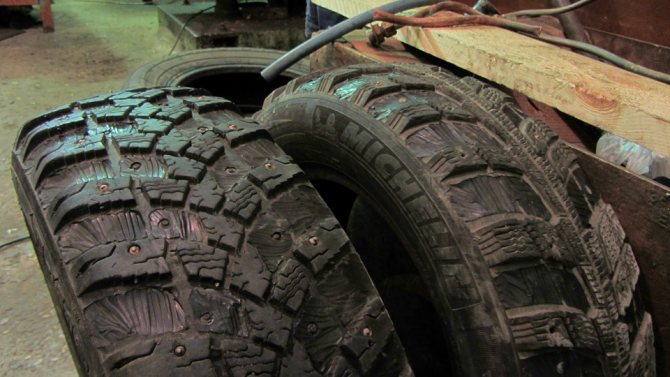
- Then it is advisable to cut small protectors on them;
- The next step is that people buy a strip of steel 5x50mm, weld squares with a side of 250mm and insert them into the rim;
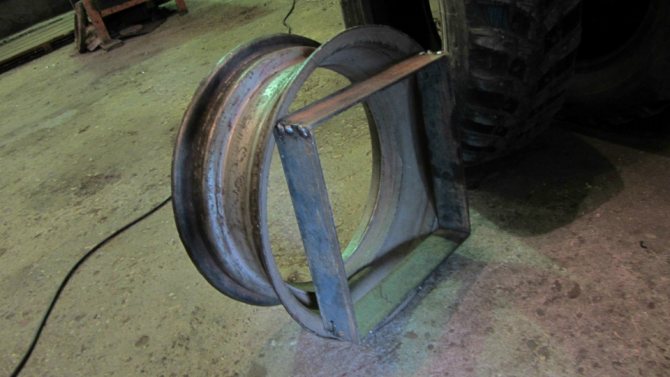
- After welding, the second wheel rim is installed and objects that look like vases are obtained;
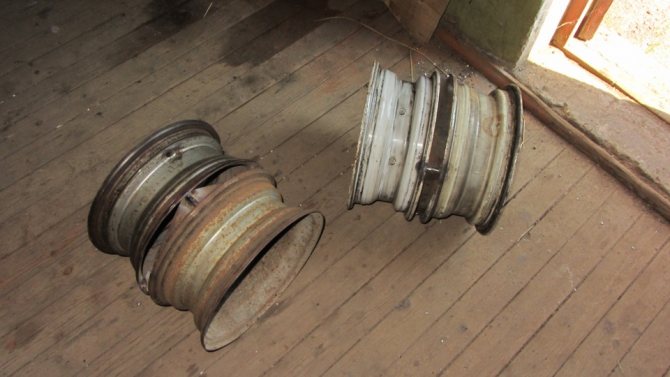
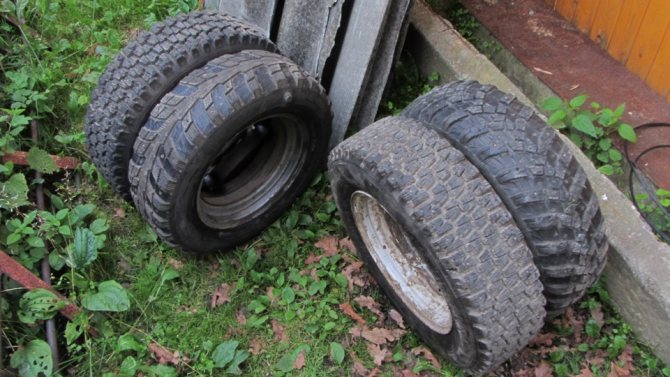
- Upon completion, tires are put on the resulting rims and the paired wheels are ready for use.
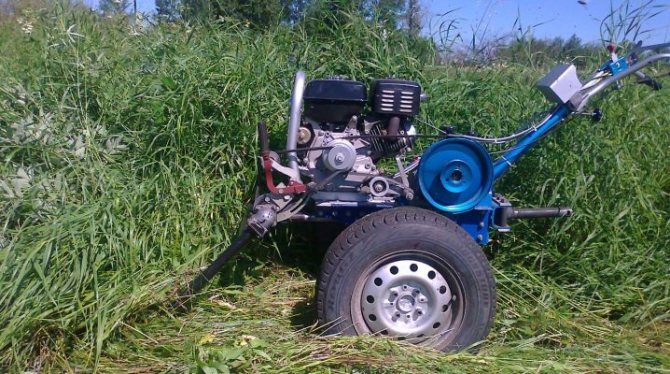
It is not difficult to obtain such useful devices; the main thing is to decide which options are needed and select all the necessary “ingredients”.
What wheels to put on a snowmobile with a walk-behind tractor engine
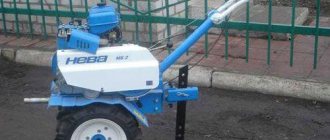
When making a snowmobile with a walk-behind tractor engine, in most cases, hand-made low-pressure wheels are used. What is unusual about snowmobile tires? They have relatively light weight, high elasticity, and the pressure on the ground is within small limits. A large rolling radius and good characteristics give the snowmobile efficiency and excellent cross-country ability.
The large volume of chambers gives the structure greater maneuverability. And when the space inside the discs is filled with foam, the snowmobile will noticeably reduce the adhesion of dirt and snow. The simplicity of the chassis design and the availability of materials allows us to avoid difficulties in the manufacture of a snowmobile.
Let's finish here. Of all the options, you can use the one you like best. You just need to decide what the purpose of the machine is and get to work!
Walk-behind tractors are the favorite technical devices of many farmers, so it is not surprising that with the use of design imagination, you can transform the unit and create on its basis an all-terrain vehicle, a caravan, a snowmobile, a pneumatic vehicle, an ATV and a swamp vehicle. Today we will look at ways to expand the functionality of the device without special financial costs and contacting specialists.
Read also: Is it necessary to mow the lawn before winter?
We make wheels for a walk-behind tractor with our own hands
A walk-behind tractor is a technique that is familiar to most farmers. In fact, this is a mobile tractor that is used for plowing soil, planting plants or transporting goods. It is convenient in small summer cottages, where it is already difficult to do everything by hand, but a large tractor is not needed. If you are reading this article, then you either already have a walk-behind tractor or are planning to purchase one.
One of the most common questions from owners of this equipment is how to make wheels for a walk-behind tractor with your own hands? The thing is that in the standard configuration they wear out very quickly, and are also not suitable for all types of soils and terrain. Buying new ones is quite expensive, so you can resort to your own skills. In this article we will look at exactly how to do this.
Harvesting potatoes with a walk-behind tractor
Hilling
A month after planting, the first shoots appear. Now you need to hill up the potatoes using a walk-behind tractor. This process should begin when the height of the shoots reaches 15-20 centimeters.
Hilling itself is a replacement for loosening the soil and weeding it. At the same time, this procedure protects the crop in the spring from return frosts. It happens that before the emergence of seedlings, the temperature may drop slightly below zero. A layer of soil covers the fruits, warming them and allowing them to survive bad weather.
Usually they spud up 2 times: the first time as soon as the sprouts appear, the second time after three weeks. But you need to know what if:
- The nest begins to grow wider, across the ridge;
- Tubers peek out from under the ground and turn green in the sun
You will have to hill up a third time. There are times when you have to hill up potatoes 4 times a season. But then you get a good harvest.
Any hiller is suitable for this procedure - with one, two or three rows. If necessary, an additional attachment is installed on the walk-behind tractor and the soil is fertilized with its help.
You can see how a two-row hiller works in this video.
Hilling secrets
Many gardeners earth up potatoes in the hot summer. But it's not right. This can damage the shoots or the root crop itself. Because of this, the plant may wilt. In addition, the procedure negatively affects health.
Therefore, it is recommended to do this in the morning or evening. And not in dry weather, but after rain, when the soil dries out a little, but remains quite moist. This makes it easier to get rid of weeds and weed the beds.
Types of wheels
First you need to figure out what types of wheels for walk-behind tractors exist. Since the equipment is used in many farming processes, the equipment varies. This also applies to pneumatic wheels, because good results and ease of use also depend on the right components. It is important to note that ordinary car wheels from Oka, Niva or Moskvich cannot be installed on the walk-behind tractor. All of the options below are larger and heavier. It would be more correct to compare them with ATV kits, although they do not always have the appropriate size.
- Pneumatic. This option can be used for arable work and for removing roots from the soil. These are large wheels in appearance, with a diameter of 40 cm and a width of 20 cm. The tread pattern must be rough for the walk-behind tractor to work well on the soil. Often this option comes as standard and is famous for its wear resistance. However, if they become unusable, you should immediately look for a replacement.
ICE-based technology
Homemade products with installed internal combustion engines have greater power and functionality compared to their electric counterparts. This allows you to significantly expand the scope of their use. Attachments in the form of a plow, flat cutter, cultivator, rake are easily mounted on the frame bracket. The unit can also be easily transformed into a roller skating rink or a home mini-tractor.
Having asked the question “how to make a homemade walk-behind tractor,” first of all you need to understand its structure. To assemble a homemade motor cultivator with your own hands, you first need an engine, transmission and reduction gearbox.
For assembly work, you will need a standard set of tools: a set of wrenches, a drill, an angle grinder, a welding machine, and when assembling more complex and load-lifting machines, also turning and milling of some components.
https://youtube.com/watch?v=1KWv0b94BIc
Chainsaw cultivator
Perhaps the best option when making a homemade motor cultivator is to use a chainsaw engine to create it. The advantages here are the performance and power of the unit, undemanding fuel requirements, light weight and compactness. And there won’t be any particular difficulties with the components when assembling it. Everything you need can be found at the car market or flea markets.
General diagram of the walk-behind tractor:
- the walk-behind tractor frame is made in the form of a diamond from a metal corner measuring 3200x3200x3200 mm;
- the engine is mounted on the cross members from above, the gas tank, as a rule, is mounted slightly below;
- the intermediate shaft supports are attached to the front struts;
- The running shaft supports are installed on the longitudinal ribs
To regulate the speed, the original gearbox is used; motorcycle sprockets (main and intermediate) are also used, the number of teeth of which is selected taking into account the required power output. The working tools of the unit are made in the form of wheels with knives and can perform the function of a trimmer, a rotary cutter or a rotary hoe.
As an alternative, you can use the engine from a lawn mower, which is similar in its characteristics to the drive of a chain saw.
Motoblock from a motorcycle
Often, old motorcycles can rust for years in garages and sheds, but they can easily find a second life. Motorcycle engines are great for creating a DIY power tiller, but the most commonly used engines are two-stroke engines from older models, as well as from scooters. But recently, motors from scooters or mopeds have also begun to be actively used, giving broken equipment a second life through conversion.
There are several types of transmission:
- gear - the most common and easy to install;
- combined (gear-worm gear);
- chain-belt, toothed;
- hydraulic gearbox is a type of transmission that is gaining popularity, but is the most expensive compared to a mechanical one.
Possible schemes
A frame of the required size is welded from a corner, to which an engine with a fuel supply system and a gas tank is attached. The transmission of torque from the gearbox, which reduces the speed, to the wheels is carried out through a chain. In this case, you can use a bridge from a donor motorcycle mounted on a wheel axle. All controls are transferred to the steering wheel of the unit.
When designing heavier equipment, a standard ZID-5 engine or its other modifications are used, which were previously widely used on various units. It is paired with a Zaporozhets gearbox and a lightweight drive axle.
Owner reviews
Often on forums you can find discussions of numerous types of issues on the topic under consideration. If you wish, you can ask users about the available nuances when choosing a support wheel for the Neva walk-behind tractor or other elements and operating experience.
The most current reviews are:
Andrey 35 years old, Novosibirsk
“The lugs are a basic device used to ensure stable operation of the walk-behind tractor, which is why I decided not to skimp on it. I adhered to the rule: “the miser pays twice.” For this reason I purchased a plowing and hilling kit.
They differ from each other, and I would like to note that hilling with lugs intended for plowing is impossible - they are much wider. The situation is similar with the hilling device - they are thin, which is why there is a high probability of rapid failure.”
Ivan 45 years old, Nizhny Novgorod
“I had a problem with a walk-behind tractor, which often began to get stuck in the mud due to continuous heavy rains, and work had to be done. I did not have the opportunity to purchase high-quality lugs.
On the forums I was advised to wear chains - this is the best option for a temporary solution to the problem. After a while, they began to constantly tear. Now I’m thinking about making the lugs myself if possible.”
As you can see, some methods may be temporary. In any case, each farmer must start from his task and only through experimentation choose the best option for himself.