Unfortunately, the design of many walk-behind tractor models does not include lighting equipment. But often a headlight on a walk-behind tractor is simply necessary, because it is not always possible to finish work in the field before dark. And when using a walk-behind tractor as a vehicle on the roads, you absolutely cannot do without a headlight.
Some manufacturers specifically sell ready-made kits of headlights, toggle switches and wires separately, thereby providing you with hassle and additional profit for yourself. But you don’t have to spend extra money on purchasing “special” lighting equipment, because connecting the light to a walk-behind tractor with your own hands is easier than it seems at first glance.
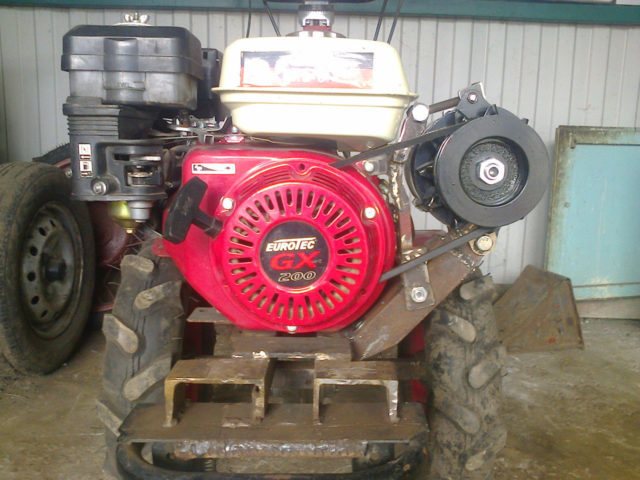
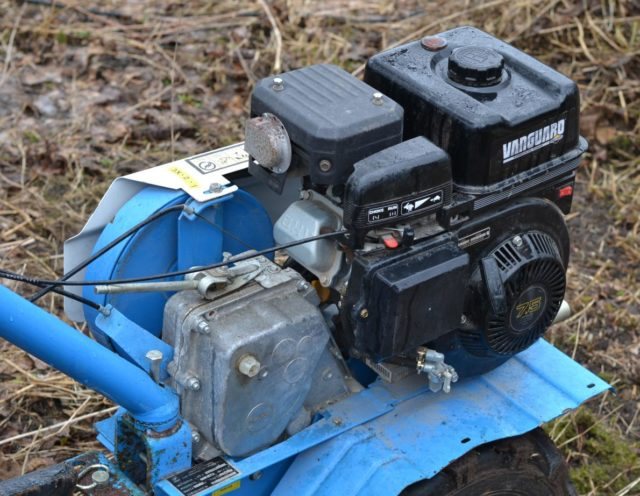
First you need to understand the structure of your walk-behind tractor. Typically, the headlight is powered by battery energy, which is charged from a generator and whose power is not always enough for high-quality lighting. In this case, you should not rush and install another additional generator, because this is not always simple, cheap and safe. The easiest way would be to use a kind of generator built into the engine, consisting of a flywheel with magnets and a lighting coil. To connect lighting to a walk-behind tractor with a single-cylinder engine, you need a lighting coil of at least 3 amperes. It will be able to power a headlight with a power of up to 40 W.
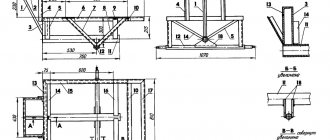
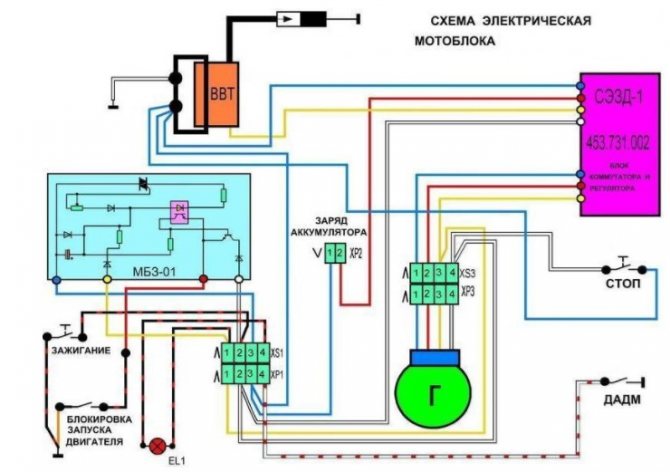
Before installing the headlight on the walk-behind tractor, you need to assemble a single electrical circuit to connect the lighting system to the generator. The drawing below shows in detail all the elements of this circuit.
Do-it-yourself ignition light on a walk-behind tractor

This should be done approximately according to the following algorithm:
- Selecting the right headlight for the walk-behind tractor. You can buy a new one on the market, or you can find a completely tolerable old headlight from a moped, car, tractor or other equipment. It goes without saying that the new equipment will shine better, last longer, and you can choose a variety of types, sizes and colors. But if it’s far from the car market, then using an old headlight won’t do any harm.
- Purchase of a toggle switch and wires.
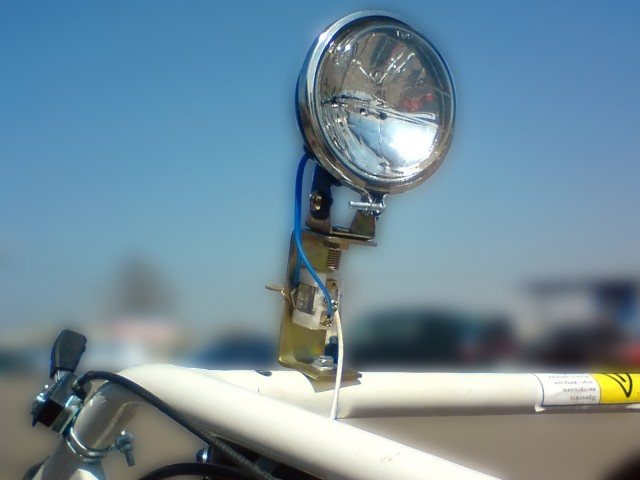
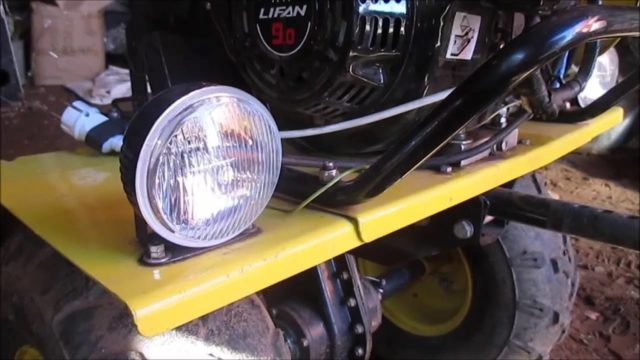
- Install headlights. The best option is the steering bar crossbar. Here the headlight will provide an optimal angle of illumination when working and driving, and will also become less dirty.
- Installation of a toggle switch. It should be secured in an easily accessible place. It's best to mount the switch on the steering wheel, somewhere close to the gearbox.
- Wiring. If the design of the walk-behind tractor provides a place for connecting a headlight, we power the wires here. If not, then the most convenient way to do this is with a 12W oil control lamp. The body of the walk-behind tractor will serve when powered by mass.
- We connect the wires to the toggle switch and the headlight. We secure the wires securely with special clamps and/or electrical tape.
How to make light on a walk-behind tractor without a generator?
It is possible to provide lighting on a walk-behind tractor without using an electric generator.
It is enough to get a 12-volt battery with an LED lamp, or a gel battery (for example, from an electric scooter). The first priority is to find a suitable place for the future mounting of the battery. The section of the frame between the motor and the gearbox is best suited for this.
The next steps to install the headlight are:
- preparing a reliable mounting stand for the battery (can be welded from corners);
- fastening the battery stand to the walk-behind tractor frame with 4 bolts;
- place the battery on the stand and secure it with a metal plate, 2 long bolts and 2 nuts;
- run the wires to the headlight and switch. After this, solder the contacts at the connection points and insulate them with tape.
We also invite you to watch the video, which describes how to install headlights on a walk-behind tractor powered by a removable battery:
- Connecting fog lights to the legendary “Nine”
This type of lighting produces a fairly bright, powerful and uniform beam. The charge lasts for several hours of battery use. The only disadvantage of such lighting is that the battery will need to be recharged regularly.
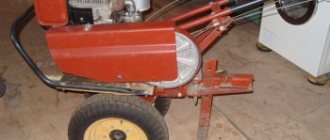
Motoblocks manufactured by Neva, MTZ, Centaur and other companies do not have headlights as standard. But with the help of our advice, your walk-behind tractor will become a reliable assistant for you, both day and night!
Many manufacturers of walk-behind tractors produce equipment designed for daytime use, so lighting elements are not provided. To cope with the problem, owners install lighting themselves, extending the life of electrical equipment. Below are details on how to make light on a walk-behind tractor, features of installing headlights, as well as difficulties that arise and how to solve them.
How to make a generator on a walk-behind tractor - simple about the complex
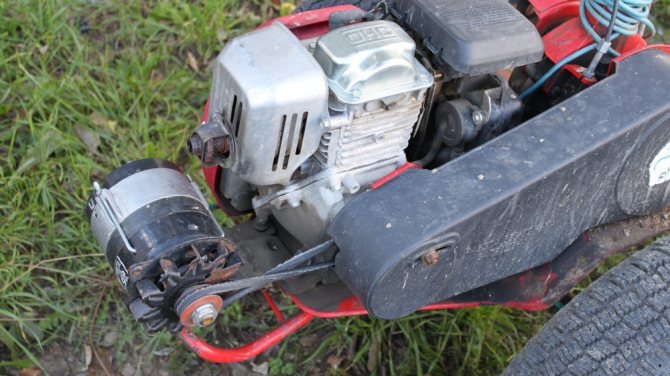
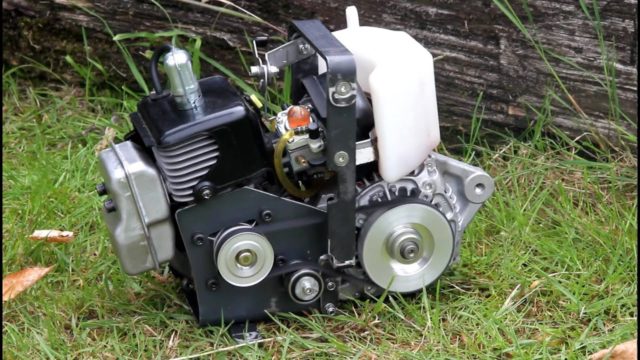
Making a generator for a walk-behind tractor with your own hands is quite simple if you follow the correct procedure. To operate, you will need an electric motor, which must be installed on an agricultural machine. The generator manufacturing algorithm is as follows:
- First you need to install the electric motor on the walk-behind tractor frame. It is best to use a pre-made frame for this, screwed to the frame of the unit with screws. Place and secure the electric motor in the frame so that its shaft and the shaft and shaft of the standard motor of the walk-behind tractor are positioned strictly parallel to each other;
- Next, you will need to install 2 pulleys - install one of them on the shaft of the gasoline motor of the walk-behind tractor, and the second - on the shaft of the electric motor used. An important role for the proper operation of the entire system is played by the correctly selected diameter of the pulleys used - the rotational speed of the electric motor depends on these dimensions. In order for the generator to operate without failure, the diameter of the pulleys must be equal to the nominal diameter, which is indicated on the packaging of these parts. It’s even better if the actual diameter of the pulleys is 10% larger than the nominal one;
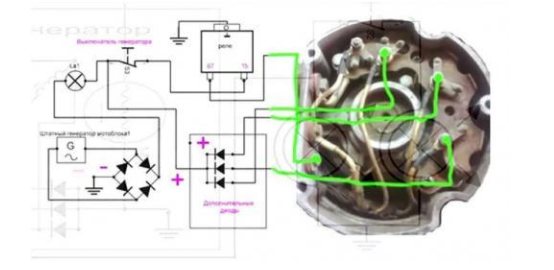
- Having completed the mechanical assembly of the generator, you can proceed to connecting it to the walk-behind tractor. To do this, use the electrical diagram shown above.
A homemade generator made from an electric motor does not require special care. However, to extend the life of the device, a number of rules should be followed.
When operating the walk-behind tractor, pay attention to the following nuances:
- if you find that the electric motor installed on the walk-behind tractor has become very hot, then replace the standard motor capacitors with elements with a lower capacity;
- The voltage of the capacitors installed in the electric motor is of great importance. The best option for operation is considered to be capacitors with a voltage of at least 400 Volts. If the standard electric motor capacitors have a lower value, then replace them with suitable elements;
- try to operate the walk-behind tractor with a generator installed in dry weather, as moisture that can get into the electric motor will inevitably lead to a short circuit inside the electrical system.
By adhering to the listed rules, you will prevent damage to your homemade generator and significantly extend its service life.
The methods listed above are suitable for the manufacture and installation of generators on Neva brand walk-behind tractors, as well as agricultural machines from other domestic and imported equipment manufacturing companies.
Lighting options for equipment of any class
Although manufacturers create walk-behind tractors without lighting, they additionally sell ready-made light kits for their own products. In this case, questions about the connection and quality of operation of the systems do not arise. If you develop your own lighting, difficulties may arise.
Therefore, it is necessary to think through a number of steps in advance:
- electrical circuit used;
- headlight power supply method;
- correct choice of light.

You can make the lighting for the walk-behind tractor yourself
How to make a headlight for a walk-behind tractor?
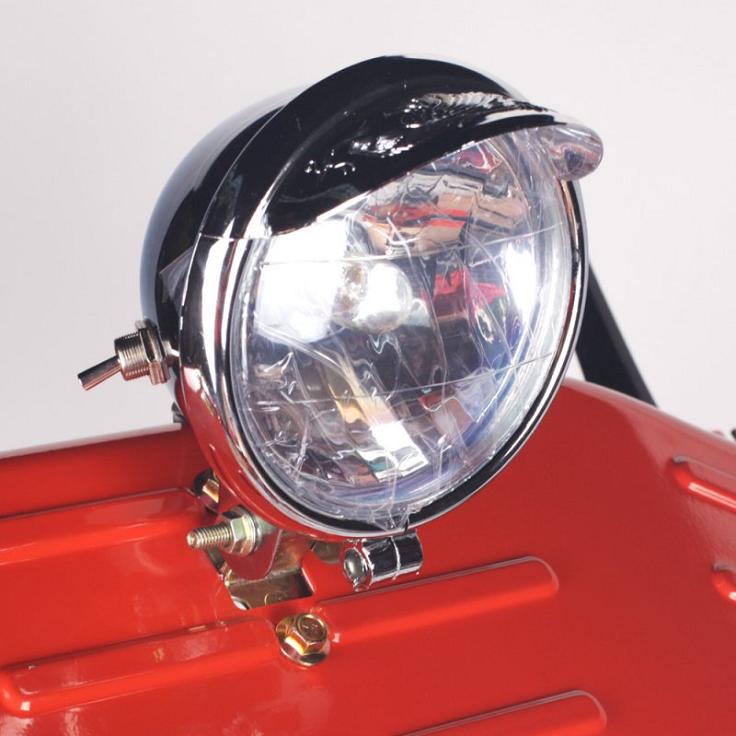
Many owners of special equipment install headlights of domestic and foreign cars as lighting on the walk-behind tractor. This option is expensive and unreliable. The light coming out is not enough and the system itself will not last more than a few months. As an alternative, they develop a headlight for a walk-behind tractor with their own hands, which allows you to obtain the necessary lighting and power of the equipment.
Step-by-step instructions for manufacturing:
- Buy an old, inexpensive headlight. Equipment from Soviet cars is suitable.
- Remove the glass protection and other elements secured with plastic fasteners from the device.
- Using plaster, pour a dummy headlight, for which the finished material is poured into the device and left until completely dry. After this, you can remove the cast, maintaining its integrity.
- Glass fiber is applied to the resulting template in three layers, each time treating the material with epoxy resin. After processing, the future headlight must dry under vacuum conditions.
Many owners install headlights of domestic cars as lighting on a walk-behind tractor. - Then they start making their own glass. This will require an oven, special slats and fiberglass. It is necessary to make a platform from the slats, which is placed in a preheated oven to 180-200 C°, where fiberglass is placed without a protective film.
- When the material begins to deform, it can be taken out for application to the processed workpiece. After pouring the mold, you need to place the future headlight in a vacuum.
- After complete cooling, the product is sanded using sandpaper.
- The final stage is the installation of electrical equipment and lamp installation.
Before using the headlight in a walk-behind tractor, it is necessary to check the operation of the device several times and the absence of short circuits to avoid breakdowns.
Electrical diagram
The headlight connection diagram is quite simple and consists of only three main elements:
- power source, including ignition, generator or battery;
- power switch - a simple button that breaks and turns on the electrical power circuit for the lamp;
- a lamp socket to which wires from the power source are connected through a switch.
A fairly simple diagram for connecting a headlight to a walk-behind tractor.
For greater reliability, all wires are placed in a special corrugation. The material protects electrical wiring from damage and allows you to secure the equipment so that it does not interfere with the use of the walk-behind tractor.
- VAZ-2101, generator: connection diagram, repair, replacement
Necessary tools for work
Before starting work, it is necessary to prepare all materials, including wiring, headlights, corrugation, and also assemble a set of tools:
- soldering iron;
- screwdrivers and wrenches;
- wire cutters and stationery knife;
- electrical tape and heat shrink tube;
- electric drill and mounting materials.
How to make a generator for a walk-behind tractor?
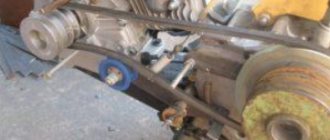
In addition to purchasing a finished product, or using another one available on the farm, you can acquire such a necessary current source in another way: with the help of your own hands and a little knowledge of electrical engineering. For example, if you have an old, unused, but still in working order Neva walk-behind tractor, it’s worth taking its parts to assemble a new structure. First, you need to choose a reliable frame of sufficient size, on which the generator and the walk-behind tractor itself, removed from the equipment, are placed, and it is important to follow the parallel arrangement of their shafts. Rotation will be transmitted to the generator by special pulleys, one of which must be installed on the gas engine shaft, and the other on the generator shaft. It is very important to correctly select the diameter of the pulley, because the rotation speed will depend on it. It is best that it corresponds to the nominal value in the equipment passport, although deviations within 10-15% will not become a problem. After installing the pulleys, they are connected with a belt, and at this point the mechanical stage of assembly can be considered complete. True, if in the future you are going to use the generator not only for a new walk-behind tractor, but also for other purposes, it is better to immediately assemble a full-fledged mobile version without or with a battery.
DIY headlight installation options
After making the headlights and preparing the tools, they proceed to installing the light on the walk-behind tractor.
Choosing a source of electricity is one of the main tasks when installing a headlight yourself
Step-by-step instructions for execution:
- Conduct wiring from the power source to the headlight, check the operation of the system and the brightness of the light.
- Install the switch in a place convenient for use, and then integrate it into the headlight power circuit. There is only one wire going from the button to the lighting.
- At the final stage, turn off the power supply and proceed to the installation of protective elements, corrugations, as well as securing all parts to the equipment. Without heat shrink and additional means, the lighting may be damaged or fail.
One of the main tasks when installing a headlight yourself is choosing a source of electricity. Usually a generator, battery or ignition is used.
From generator
Most manufacturers make walk-behind tractors with electric generators with sufficient power for normal operation of equipment and connection of lighting. If the equipment is weak, you can replace the generator with a more suitable type.
Without a generator or battery, you can connect the lighting yourself
Step-by-step installation instructions:
- connect wires to the contacts of the generator, and one of them must be connected via a button;
- conduct wiring from the generator and switch to the lighting fixture and check the operation of the system;
- fix the headlight on the frame and use protective elements to prevent moisture and damage.
You can connect the lighting yourself without a generator and battery, but this will require a headlight with an independent power source.
From ignition
An alternative option for lighting a walk-behind tractor with your own hands without a generator is connecting to the ignition contacts. Each time after the engine starts, power will appear and the installed headlight will light up. The main disadvantage is the inability to turn off the equipment until the walk-behind tractor stalls.
When considering options for how to install a headlight on a walk-behind tractor, they think about the ease of use of lighting. It is necessary to consider additional elements that will allow you to turn off the lights when parking, regardless of the state of the equipment.
Connection to the ignition contacts - an alternative version of the light for the walk-behind tractor
How to connect a headlight to a walk-behind tractor with your own hands
Many walk-behind tractors are sold without factory-connected headlights. But you shouldn’t be upset about this, because even an inexperienced master will be able to understand how to make a headlight for this agricultural unit.
Sometimes many manufacturers offer customers ready-made headlights for a walk-behind tractor with the addition of a switch and wire. But the opportunity to purchase this kind of product will negatively affect your financial condition. Factory lighting systems for walk-behind tractors are much more expensive and only manufacturers benefit from this, wanting to make money on gullible consumers. Why spend extra money if you can simply figure out on your own how to install lighting on mini-tractors using improvised, sometimes unnecessary, devices.
You can use different types of lighting elements:
- Additional headlights from a moped, scooter, tractor, car or other vehicle at your disposal.
- You can buy a used headlight on the automobile market in places where transport and electrical parts are dismantled and sorted.
- You can select a new headlight taking into account the color of the mini-tractor itself.
The ideal option is to choose a headlight for a scooter or small motorcycle.
In addition, it is worth purchasing an electrical wire of the required length and a toggle switch for switching the lighting. It is most convenient to connect the toggle switch to the steering column near the gear shift lever. The headlight itself may be located in the steering column or on the front of the engine. But the first option will be preferable. On an engine, the headlight will constantly become dirty while the mechanism is moving, especially sometimes in the rain.
The next step in connecting the headlight is to run wires to it. The mechanism may include a connection point for the factory headlight. In this case, we simply connect a wire to it. If there is none, then the power should be removed from the oil pressure warning lamp terminal. We connect the wire to the switch, and then to the headlight. The cord should be attached to the steering column using electrical tape or clamps.
Also, many are concerned about the question of whether it is possible to make light on a walk-behind tractor without a generator. It is worth noting that a battery is required, which will be installed using a quick-release mount and recharged in the workshop.
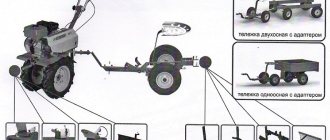
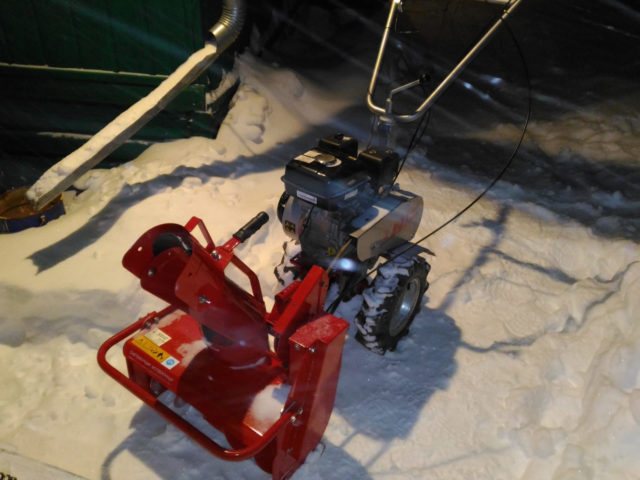
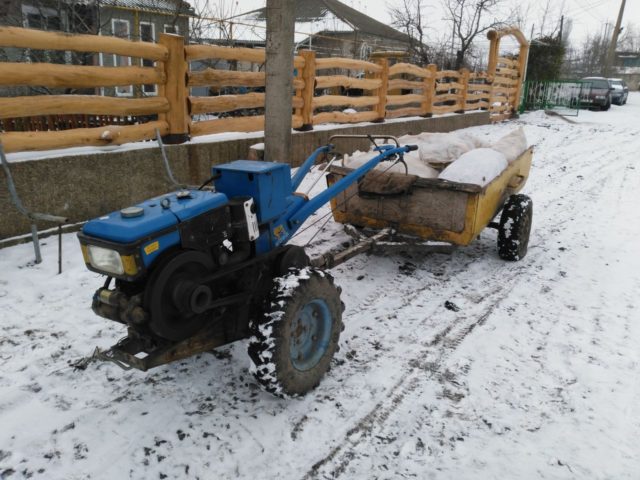
For a walk-behind tractor, there are wide limits to its use, ranging from plowing land, pumping water to cultivating virgin soil and transporting heavy loads.
Specifics of lighting selection and installation
Before installing the headlight on the walk-behind tractor, you need to decide on the equipment used. The choice of lamp for lighting depends on the complexity and nature of the work being carried out, as well as lighting requirements.
- What are the minimum and maximum speeds of the walk-behind tractor and how to regulate them?
The more light you need at night, the greater the power of the selected lamp should be.
There are also technical issues when installing headlights. If the generator power is not enough to provide a constant flow of light, 12 V batteries are used. It is recommended to use lightweight equipment so as not to increase the load on the walk-behind tractor.
For walk-behind tractors with belt drive
A special feature of belt drive technology is the absence of a generator. Therefore, the owner of special equipment must independently install electrical equipment using plumbing tools and additional spare parts. They can be removed from a car or other equipment.
The main thing during installation is to replace the generator pulley with one that matches the belt drive of the walk-behind tractor. For greater convenience, the electrical equipment is mounted at the back, after which its functionality is checked and the lighting is connected.
The absence of a generator is a feature of belt drive technology
For heavy walk-behind tractors
Heavy walk-behind tractors do not use generators or belt drives, so batteries are used for the light source.
It is recommended to install batteries from motorcycles, since they have sufficient power, small dimensions and weight.
The only drawback is that you need to make and secure the battery mount yourself. An iron profile or corners welded into a single structure are suitable for this. And for greater reliability, the product is treated with soft material, after which the battery is attached.
Connecting and checking the headlight
The procedure for installing light on equipment does not take much time.
Basic steps on how to connect a headlight to a walk-behind tractor:
- install an external power source for the light;
- connect the wires to electricity and the headlight;
- add a switch to turn the light on and off;
- perform final installation of elements.
After this, testing of lighting, uninterrupted operation and reliability of the switch is carried out.
Possible difficulties and ways to solve them
Although installing a headlight on a walk-behind tractor is an easy task with a minimum number of elements, equipment owners face problems.
Main difficulties and solutions:
- the headlight does not light: it is necessary to check the functionality of the structure from a constant power source;
- The light does not turn on/off: the malfunction is due to a button that has failed, or contacts that are loose;
- after installing the headlight on the walk-behind tractor, nothing happens: the problem lies in the generator or battery, and the electrical wires may also be damaged.
There are a large number of walk-behind tractors of various types on the agricultural machinery market. But not all models have standard lighting. This problem can be solved with the help of simple modernization manipulations.
How to install lighting on motorcycles using a generator?
The easiest way to make a light for a walk-behind tractor with your own hands is from a “native” electric generator. If the manufacturer provides such a possibility, then the installed generator has a certain power reserve. It will be sufficient for the normal functioning of the key electrical appliances of the walk-behind tractor and powering additionally installed electrical equipment (turn signals, headlights, sound signal).
The algorithm for connecting light from an installed electric generator is not complicated:
- Connect the power generating device to the switch on the steering column using a wire;
- From the switch, route a system of wires to electrical equipment (on a walk-behind tractor this is a headlight);
- Place the wires in a corrugation to protect them from mechanical damage. This way they will not hang out and interfere with work on the unit.
If the generator has a high enough power level, the lighting will be good. When the light goes out at low speeds, it is necessary to change the installed electric generator to a device from a tractor or machine.
You can install a generator from Zaporozhets. The device is small in size, so it can easily fit in the area between the motor and gearbox. Installation is easy. Fasteners are first made to fasten the electric generator and fix it to the frame: strong metal slats are welded to the frame, then a clamp is attached.
The presented diagram will help you figure out how to properly attach the device to the walk-behind tractor.
An electric generator from an old or new car can provide normal lighting for a walk-behind tractor. It is also possible to solve other problems with connecting various electrical equipment.
Tools
If the unit is equipped with its own generator, then resolving the issue of lighting arrangement is greatly simplified. You just need to install the flashlight and supply power to it.
To do this you will need the following tools and devices:
- electric drill;
- soldering iron;
- Screwdriver Set;
- spanners;
- wire cutters;
- stationery knife;
- electrical cable;
- heat-shrink tubing;
- headlight, side and turning lights.
Installing a headlight on a walk-behind tractor using a standard generator is carried out in the following sequence:
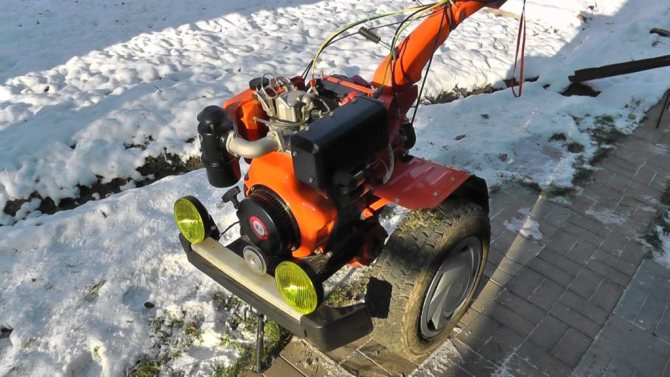
- The bases of the lighting fixtures are screwed to the unit body. It is advisable to place the headlight on the walk-behind tractor on a separate bracket located on the front part with an elevation above the ground of 100-120 cm.
- We install buttons for turning on the flashlight, turning and side lights on the steering column. You should choose devices of increased strength and moisture-proof design. Fixation is carried out with clamps or metal screws.
- The electrical cable is pulled into a corrugated tube. This must be done to ensure that the wiring is protected from moisture, mechanical damage and rodents. The corrugated tube is pulled to the steering column and frame so that there is no sagging.
- The wires are connected to the generator and electrical equipment terminals. The engine is started and the functionality of the lighting system is checked. After this, all twists and joints are isolated.
See » Powerful universal walk-behind tractor Volgar
When idling and at low speeds, the light dims. To ensure constant lighting, you need to use a voltage stabilizer or install a powerful generator.
Electric generators from MTZ tractors and ZAZ cars have proven themselves well.
These devices are compact and can easily find a place on the body of a motor cultivator. To connect a non-standard generator to a walk-behind tractor, you will need to make an additional bracket. It is assembled from a steel angle on the frame of the car.
You can make light on a walk-behind tractor without a generator by installing a 12 V battery. The battery from a motorcycle, moped or boat is used as a power source. Don't give up on your car battery.
If you put a heavy power source on the cultivator, you can solve several related problems - equip the unit with an electric starter and significantly make its body heavier. In addition, it would be useful to be able to illuminate the area at night without the engine running.
READ MORE: Microfiber blanket 33 photos features and advantages of microfiber blankets
This function can be useful on a picnic or night fishing.
Installing the headlight on a walk-behind tractor using a battery is carried out in the following sequence:
- Arrangement of the frame for the power source. It is best to use a steel corner for this. The frame should be attached directly to the frame of the motor-cultivator body. After lowering the battery into the niche, it is firmly secured in it using steel straps.
- Attaching a lantern and auxiliary lights. The headlight is placed on the walk-behind tractor so that it illuminates the widest possible sector without blinding the operator or oncoming vehicles. It is better to choose devices with an adjustable beam angle.
- Location of the electrical cable in the corrugation along the body of the unit. Installation and connection of control devices. Tester checking the correct assembly of the electrical system.
- Connecting the wire to the battery terminals, leading the wire into the junction box. Connecting wires to the switch, insulating joints, joints and twists.
How to make light on a walk-behind tractor without a generator?
It is quite possible to connect the light to a walk-behind tractor without a generator. You will need an LED lamp and a 12-volt battery. You can use a rechargeable battery from a car or a gel battery that is installed on electric scooters/electric bicycles.
It is important to choose the right place to install the battery. It is often compact in size, so you can use the area on the frame between the engine and gearbox.
The battery installation is carried out according to the following scheme:
- Steel fastenings are being prepared. They must be sized to fit the battery;
- The finished fastenings are screwed to the frame with four bolts for their secure fixation;
- The battery itself is installed, to secure it you will need two bolts, nuts and a metal plate;
- The electrical wire is stretched from the battery to the switch, then to the electrical equipment (headlight on the walk-behind tractor). All areas where wires are connected are fixed by soldering and are insulated with high quality.
As a rule, the headlight connected to the battery shines evenly and intensely. The battery charge will last for a couple of hours of continuous operation, but will periodically require recharging from an electrical source. Therefore, it is worth trying to make the light on the walk-behind tractor from the ignition. The wire connects directly to the ignition system, toggle switch and headlight. So the lighting turns on only during operation of the unit.
FUEL-FREE GENERATORS. How to make it yourself (Diagrams, Instructions)
Original taken from geogen_mir in FUEL-FREE GENERATORS.
How to make it yourself (Diagrams, Instructions)HOW TO MAKE A FUEL-FREE GENERATOR WITH YOUR OWN HANDS
Many owners sooner or later begin to think about alternative energy sources. We propose to consider what an autonomous fuel-free generator by Tesla, Hendershot, Romanov, Tariel Kanapadze, Smith, Bedini is, the principle of operation of the unit, its circuit and how to make the device with your own hands. REVIEW OF GENERATORS When using a fuel-free generator, an internal combustion engine is not required, since the device should not convert the chemical energy of the fuel into mechanical energy to generate electricity. This electromagnetic device works in such a way that the electricity generated by the generator is recirculated back into the system through a coil.
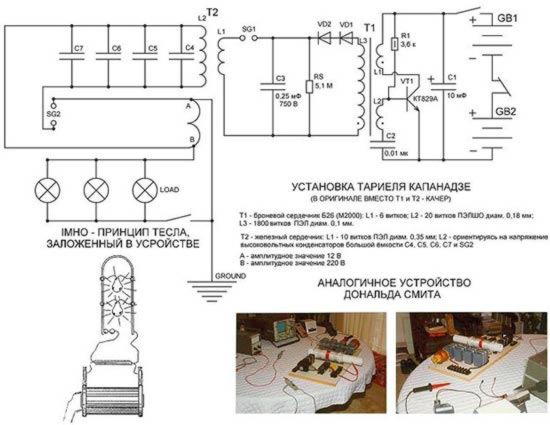
Photo - Kapanadze GeneratorElectric generators are of two types. An internal combustion engine, with a piston and rings, a connecting rod, spark plugs, a fuel tank, a carburetor, and a machine using hobby motors, coils, diodes, AVRs, capacitors, etc. The internal combustion engine in fuel-free generators is replaced by an electromechanical device that receives power from the generator and using the same, converts it into mechanical energy with an efficiency of more than 98%. The cycle repeats itself over and over again. So the concept here is to replace the internal combustion engine, which depends on fuel, with an electromechanical device.
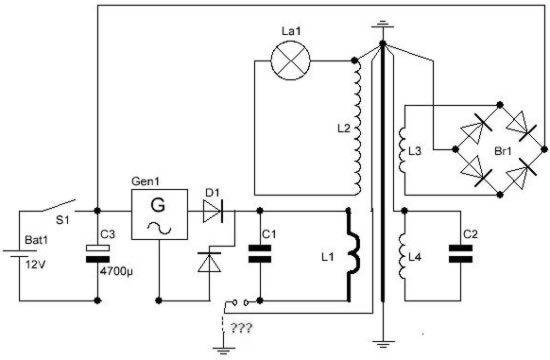
Photo - Generator CircuitMechanical energy will be used to drive the generator and produce the current generated by the generator to power the electromechanical device. The fuelless generator, which is used to replace the internal combustion engine, is designed in such a way that it uses less energy at the power output of the generator. Video: homemade fuelless generator TESLA GENERATOR The Tesla linear electric generator is the main prototype of the working device. The patent for it was registered back in the 19th century. The main advantage of the device is that it can be built even at home using solar energy. The iron or steel plate is insulated with external conductors, after which it is placed as high as possible in the air. We place the second plate in sand, earth or other grounded surface. A wire starts from a metal plate, the attachment is made with a capacitor on one side of the plate and a second cable runs from the base of the plate to the other side of the capacitor.
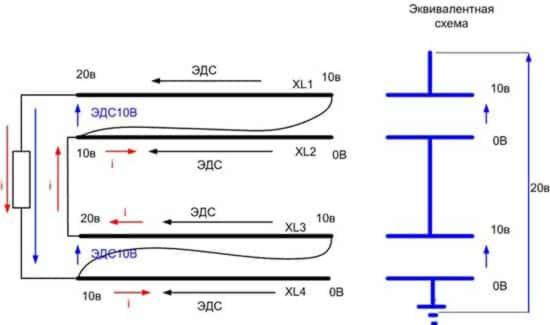
Photo - Tesla fuel-free generator Such a home-made fuel-free mechanical generator of free energy electricity is fully functional in theory, but for the actual implementation of the plan it is better to use more common models, for example, inventors Adams, Sobolev, Alekseenko, Gromov, Donald, Kondrashov, Motovilov, Melnichenko and others. You can assemble a working device even if you redesign any of the listed devices; it will be cheaper than connecting everything yourself. In addition to solar energy, you can use turbine generators that operate without fuel using water energy. Magnets completely cover the rotating metal disks, a flange and a self-powered wire are also added to the device, which significantly reduces losses, making this heat generator more efficient than solar. Due to high asynchronous oscillations, this cotton fuel-free generator suffers from eddy electricity, so it cannot be used in a car or to power a home, because. the impulse may burn out the engines.
Photo - Adams fuel-free generatorBut Faraday's hydrodynamic law also suggests using a simple perpetual generator. Its magnetic disk is divided into spiral curves that radiate energy from the center to the outer edge, reducing resonance. In a given high-voltage electrical system, if there are two turns side by side, an electric current moves along the wire, the current passing through the loop will create a magnetic field that will be emitted against the current passing through the second loop, creating resistance. HOW TO MAKE A GENERATOR There are two options for doing the job: CONTINUED HERE
Tags: How to make light on a walk-behind tractor without a generator with your own hands video